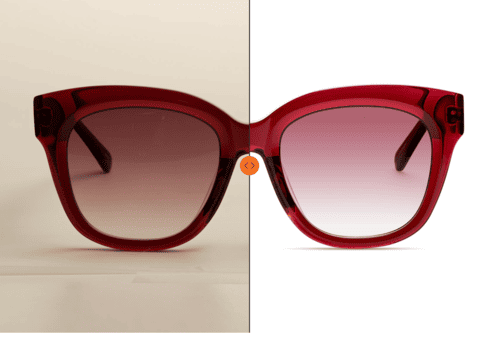
Step-by-Step Guide to eCommerce Product Photo Retouching for Beginners
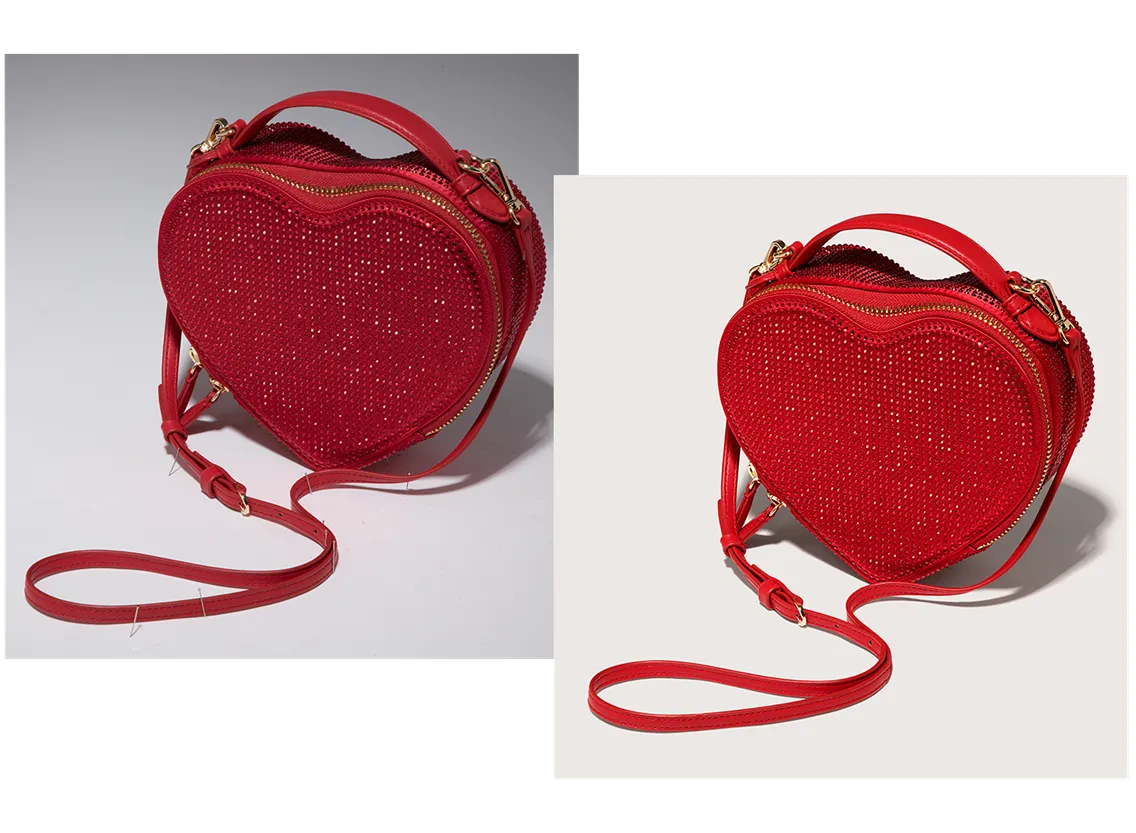
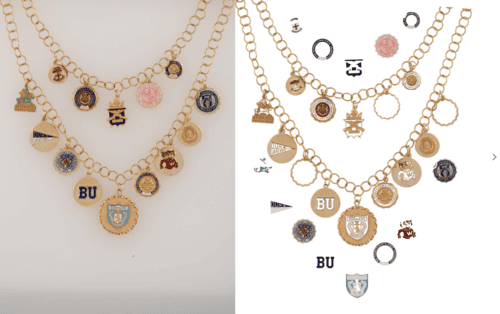
When a shopper scrolls through a catalog, their eyes are drawn to clear, vibrant images with balanced colors, seamless backgrounds, and sharp details. Every wrinkle in the fabric, speck of dust on a piece of jewelry, or uneven shadows from the packaging can distract from the product you are selling. Professional retouching fixes these flaws and elevates the product, helping it connect with potential buyers.
Getting Started: Tools You Need for Photo Editing and Retouching
The right software and hardware can make the editing process smoother, more efficient, and ultimately more professional. This section explores the essential tools you’ll need, why they matter, and how to optimize your setup for eCommerce product photography.
Essential Software for Photo Retouching
Your choice of software determines the flexibility and precision you have while editing. Here are the top options, with their strengths and why they’re popular in eCommerce:
Adobe Photoshop
Photoshop is the gold standard in photo retouching, offering unparalleled control over details. From advanced tools like masks and layers to techniques like frequency separation, Photoshop is a must-have for intricate edits.
Best For: Clipping paths, removing imperfections, enhancing textures, and creative finishing touches.
Key Tools: Healing Brush, Clone Stamp, Select Subject, and Dodge & Burn.
Adobe Lightroom
Lightroom is perfect for batch editing and basic adjustments like exposure, white balance, and color grading. Its intuitive interface makes it a favorite for beginners.
Best For: Pre-retouching tasks such as culling, cropping, and initial color corrections.
Key Features: Presets for consistent edits across multiple images and non-destructive editing.
Capture One
Capture One excels in tethered shooting and raw file processing. It’s highly customizable and offers superior color grading options, especially for studio work.
Best For: High-volume product shoots with intricate lighting and color requirements.
Key Features: Layer-based editing and precise color control.
Recommended Hardware for Optimal Retouching
Having the right hardware is just as important as choosing the right software. Here’s what you need to ensure accuracy and efficiency:
High-Resolution Monitor
A high-quality monitor ensures accurate color representation and sharp details. Look for monitors with at least 99% sRGB or AdobeRGB coverage.
Top Picks: Apple iMac, Eizo ColorEdge, Dell UltraSharp, or BenQ PD series monitors. Use tools like SpyderX or X-Rite i1Display to calibrate your monitor regularly, ensuring consistency between what you see on the screen and the final output.
Graphics Tablet
Precision is key in retouching, and a graphics tablet provides better control than a mouse. Tools like the Wacom Intuos or XP-Pen tablets allow you to make detailed edits with natural hand movements. Best For: Dodge & Burn, creating clipping paths, and detailed masking work.
Fast Computer
Processor: Editing software like Photoshop demands a fast processor (Intel i7 or Apple M1/M2 chips are ideal).
RAM: At least 16GB for smooth multitasking, but 32GB or 64GB is recommended for heavy retouching projects.
Storage: SSDs (Solid-State Drives) ensure faster file access and save time compared to traditional hard drives.
Color-Accurate Lighting
Editing in a poorly lit environment can lead to inaccurate brightness and color adjustments. Use neutral, daylight-balanced lighting (5000K–6500K) in your workspace to avoid visual distortions.
Organizing Your Workflow for Retouching Efficiency
Beyond hardware and software, an organized workflow helps you work faster and smarter. Here’s how to set up for success:
File Management
- Organize your files into folders by client, project, or product category.
- Use consistent naming conventions for easy retrieval (e.g., “Client_ProductName_Date.jpg”).
- Store raw files, edited versions, and exports in separate folders.
Backup Solutions
- Invest in external drives or cloud storage to ensure your work is always safe. Popular options include Google Drive, Dropbox, or external SSDs.
- Use automated backup tools to save time and avoid accidental data loss.
Workspace Setup
- Use dual monitors for multitasking, one for editing and the other for tools or references.
- Keep your editing station free from distractions, with all necessary tools within reach.
Step-by-Step Photo Editing Tutorial for Beginners
Retouching product images for eCommerce requires a methodical approach to achieve professional-quality results. Whether you're working with a single image or batch editing for a large catalog, following a structured workflow ensures consistency and saves time. Below is a comprehensive step-by-step tutorial, designed for beginners and photographers transitioning into eCommerce, that covers every critical aspect of retouching.
1. Prepare Your Workspace
Setting up your workspace is the foundation for effective retouching. A poorly configured environment can lead to inaccurate edits, inconsistent results, or wasted time. Follow these steps:
- Calibrate Your Monitor: Use a tool like SpyderX or X-Rite i1Display to ensure your monitor accurately displays colors and brightness.
- Optimize Lighting Conditions: Edit in a well-lit room to avoid color distortions caused by ambient lighting.
- Set Up Your Workspace Layout: Arrange your tools for easy access. In Photoshop, customize the workspace to show frequently used tools like Layers, Adjustments, and Histogram.
2. Culling: Choose the Best Images
Not all images are equally good, even from the best shoot. Culling helps you identify the strongest candidates:
- Import Your Images: Use software like Lightroom or Capture One to import your raw files. Organize them into collections or folders based on product types or projects.
- Review All Shots: Use Lightroom’s thumbnail view to scan through your images quickly.
- Eliminate Rejects: Remove blurred, poorly lit, or redundant shots.
- Flag or Rate: Use star ratings or flags to mark the best images for retouching.
- Batch Sync: In Lightroom, sync basic adjustments (exposure, white balance) across similar images to save time.
3. Clipping Path: Isolating the Product
Clipping paths are essential for isolating products from their backgrounds or preparing them for compositing. Here’s how to create a precise clipping path in Photoshop:
- Select the Pen Tool: Use it to manually trace around the product edges for the most accurate results.
- Save the Path: Convert it into a selection and mask the background, ensuring non-destructive editing.
- Refine the Edges: Use the "Refine Edge" or "Select and Mask" tool to smooth out jagged edges or handle fine details like hair or fur.
- Apply Background: Replace the background with pure white, a gradient, or another custom background based on the platform's requirements.
4. Crop and Adjust Composition
Proper composition enhances the product’s visual appeal and aligns with eCommerce platform specifications:
- Rule of Thirds: Use Photoshop’s grid overlays to align the product along intersecting points for balance.
- Straightening: Fix tilted images using the Crop tool’s straighten feature.
- Lens Corrections: Address distortions caused by wide-angle lenses using Lightroom’s "Transform" tool or Photoshop’s "Lens Correction" filter.
- Fill the Frame: Ensure the product occupies the majority of the frame (e.g., platforms like Macy’s recommend at least 85% of the frame filled by the product).
5. Color Correction
Accurate colors are crucial in eCommerce, as they ensure customer expectations align with reality. Follow these steps:
- White Balance Adjustment: Use the Eyedropper tool to set the correct white balance by sampling a neutral area (e.g., white or gray).
- Exposure and Contrast: Brighten the image for a clean look, adjusting the contrast to make the product stand out.
- Saturation and Vibrance: Enhance colors subtly, ensuring they don’t appear oversaturated or unrealistic.
- Selective Color Adjustments: Use Adjustment Layers to target specific areas, like enhancing the redness of a label or the sparkle of a gemstone.
6. Remove Imperfections with Product Retouching
Even the best-shot images have minor flaws that need cleaning up:
- Healing Brush Tool: Quickly fix small blemishes like dust, scratches, or fingerprints on products.
- Clone Stamp Tool: Duplicate textures for seamless corrections, especially in complex areas.
- Patch Tool: Replace larger problem areas, like creases in fabric, by blending them with surrounding textures.
- Wrinkle and Crease Removal: Use a combination of the Healing Brush and Dodge & Burn tools to smooth out fabric inconsistencies while retaining texture.
7. Enhance Product Texture and Details
Highlighting texture is essential for conveying quality and craftsmanship:
- Sharpening: Use the High Pass filter on a duplicated layer. Set the layer to "Overlay" blending mode and adjust opacity for controlled sharpening.
- Dodge & Burn: Manually lighten and darken areas to create depth, especially on textured materials like leather or metal.
- Noise Reduction: Apply noise reduction sparingly to smooth out grainy areas, particularly in shadows, without compromising detail.
8. Background Editing
A clean, distraction-free background ensures the product takes center stage. Use Photoshop’s "Select Subject" tool for quick background isolation, refining the edges as needed. Then:
- Add Gradients: For a polished look, replace plain white with subtle gradients or light-colored backgrounds.
- Shadows and Reflections: Retain or recreate natural shadows to ground the product and maintain realism.
9. Add Final Retouching Touches
Highlight and Reflection Control
Highlights and reflections are crucial in making materials like metal, glass, or glossy surfaces appear realistic and appealing. Here’s how to refine them:
- Selective Highlights: Use the Dodge tool (set to low exposure, 5–10%) to enhance natural highlights on reflective areas like jewelry or glass.
- Gradient Maps for Glow: Apply subtle gradient maps to create controlled light falloff, adding depth and dimension to flat-looking products.
- Avoid Harsh Highlights: Use the Clone Stamp tool or a low-opacity Brush to blend overly bright spots into surrounding areas for a balanced look.
Perfecting Shadows
Shadows anchor the product visually, giving it depth and a sense of realism. Refined shadows can make or break the professionalism of an image:
- Natural Drop Shadows: For products on white backgrounds, recreate drop shadows using the Elliptical Marquee tool, filled with black, and then adjust opacity and Gaussian Blur for realism.
- Contact Shadows: Add subtle contact shadows directly beneath the product to ensure it doesn’t appear to be "floating."
- Directional Shadows: Ensure shadows align with the lighting direction in the image for consistency and believability.
Final Inspection
Before exporting, review the image for any missed details or inconsistencies:
- Zoom in and scan edges for clipping errors or unrefined areas.
- Ensure color consistency across all parts of the image.
- Compare the final edit with the raw image to confirm improvements without losing realism.
10. Exporting in different formats
Each eCommerce platform has specific image requirements that must be met. Compression: Use tools like TinyPNG or Photoshop’s Export for Web to reduce file size without losing quality.
Save in Multiple Formats: Keep the master file (PSD) for future edits and export versions in JPEG or PNG as required.
Specialized Retouching Techniques for eCommerce Photography
Different product categories demand tailored retouching techniques to highlight unique features and overcome challenges. From handling reflective surfaces to maintaining texture accuracy, understanding these nuances is key to producing professional-grade images that stand out in a competitive marketplace. This section delves deeper into specialized techniques for specific types of eCommerce photography.
On-Model eCommerce Photography Retouching
Catalog photography is a cornerstone of fashion brands, typically showcasing a collection of products. These images are often shot in a studio with controlled lighting and a minimalist backdrop, ensuring the focus remains entirely on the product and model. The goal of lookbook imagery is to present the products clearly while maintaining a sophisticated, cohesive aesthetic that aligns with the brand’s identity.
On-Model Retouching Techniques
Unlike lifestyle photography, lookbook retouching emphasizes the following:
- Preserve Consistency: Images need a uniform look across the collection, from lighting to color tones.
- Focus on Products: While models may be present, the product, be it clothing, accessories, or footwear, remains the star.
- Neutralize Backgrounds and Skin: Adjust hues to ensure neutral tones in the backdrop and any skin in the photo doesn't clash with the product.
- Fabric Details: Enhance textures like denim weave, knit patterns, or silk sheen using sharpening techniques (e.g., High Pass Filter). Use Dodge & Burn to add dimension, enhancing the natural folds and contours of the material while maintaining realism. Avoid overly smoothing fabrics to retain their tactile appeal.
- Remove Wrinkles: Use the Stamp Tool to smooth out minor fabric wrinkles or folds that detract from the product’s appearance.
- Color Accuracy: Ensure the product’s true color is represented. This is especially important for items like clothing, where color fidelity impacts buyer satisfaction.
- Subtle Refinements: Over-editing can make products appear unrealistic or unrelatable. It leads to high return rates for eCommerce businesses and a low reputation for you as a photographer.
- Use Batch Processing: For global adjustments like exposure or white balance, use batch editing in Lightroom to save time.
- Refer to Style Guides: Always refer to the brand’s style guide for direction on colors, tones, and overall aesthetic.
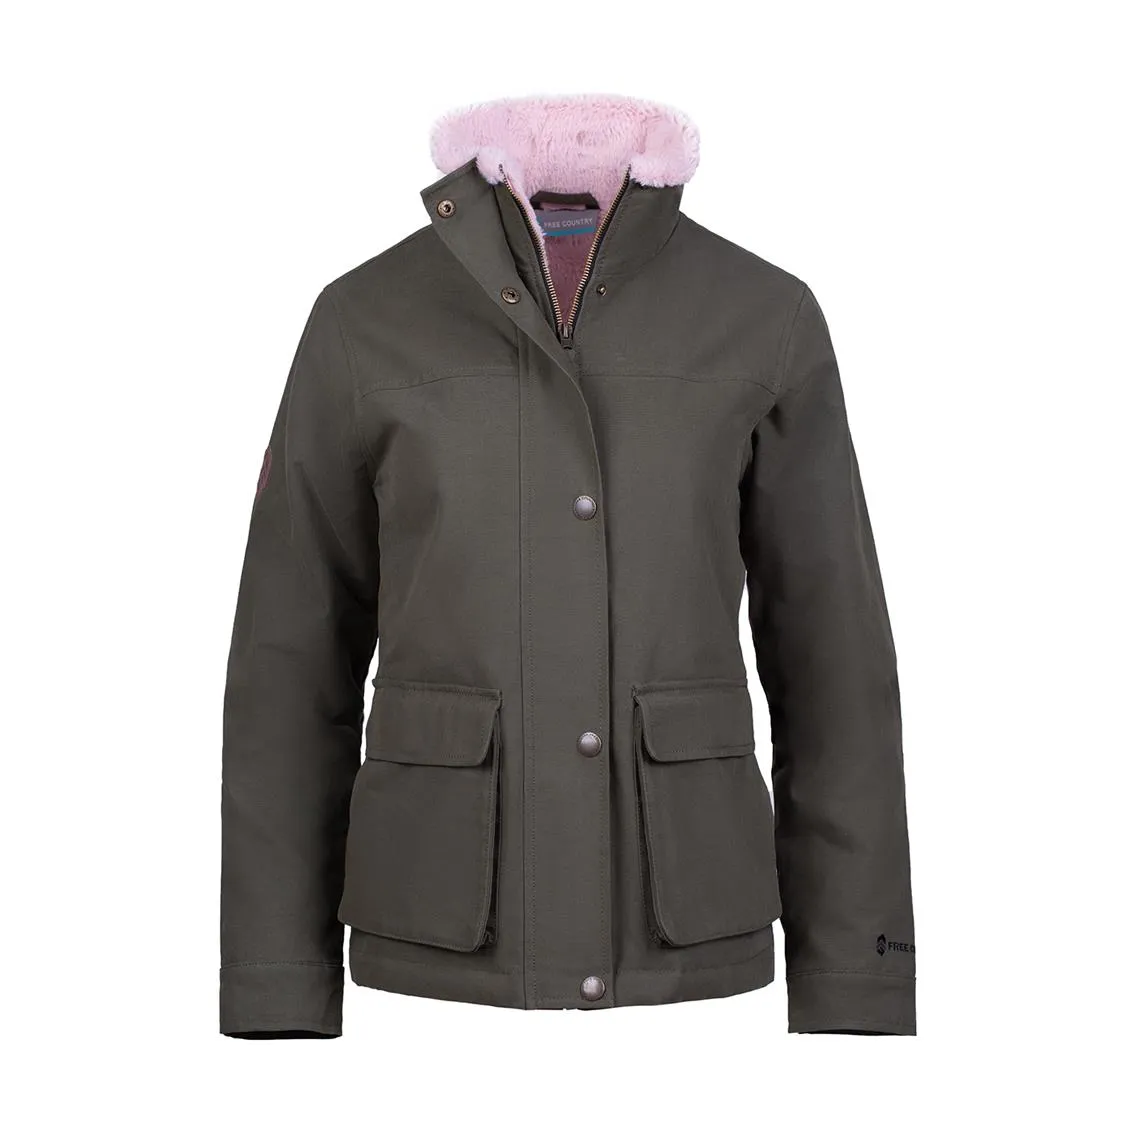
Mannequin and Ghost Mannequin Product Photography Editing Techniques
This technique is common for apparel eCommerce photography, where the garment appears to be worn without a visible model.
- Removing the Mannequin: Use selection tools to carefully isolate and remove the mannequin, keeping the garment’s natural contours intact.
- Reconstruct Missing Areas: Clone and patch missing parts of the garment that were hidden by the mannequin.
- Adjust Fabric Texture: Enhance fabric textures to make them appear natural and lifelike using dodge & burn.
- Color Consistency: Ensure color consistency across the entire garment, especially for complex materials like velvet, satin, or denim.
Flat Lay Product Photography Editing
Flat lay photography offers a top-down view, often used for fashion, accessories, or lifestyle products.
- Straighten and Align: Use transform tools to correct distortion and ensure all elements are aligned perfectly.
- Enhance Textures: Highlight fabric, wood grain, or other textures with sharpening tools.
- Eliminate Shadows and Wrinkles: Clean up any distracting shadows or wrinkles in the layout.
- Color and Contrast: Adjust contrast to create a clean and visually appealing image, especially for minimalistic compositions.
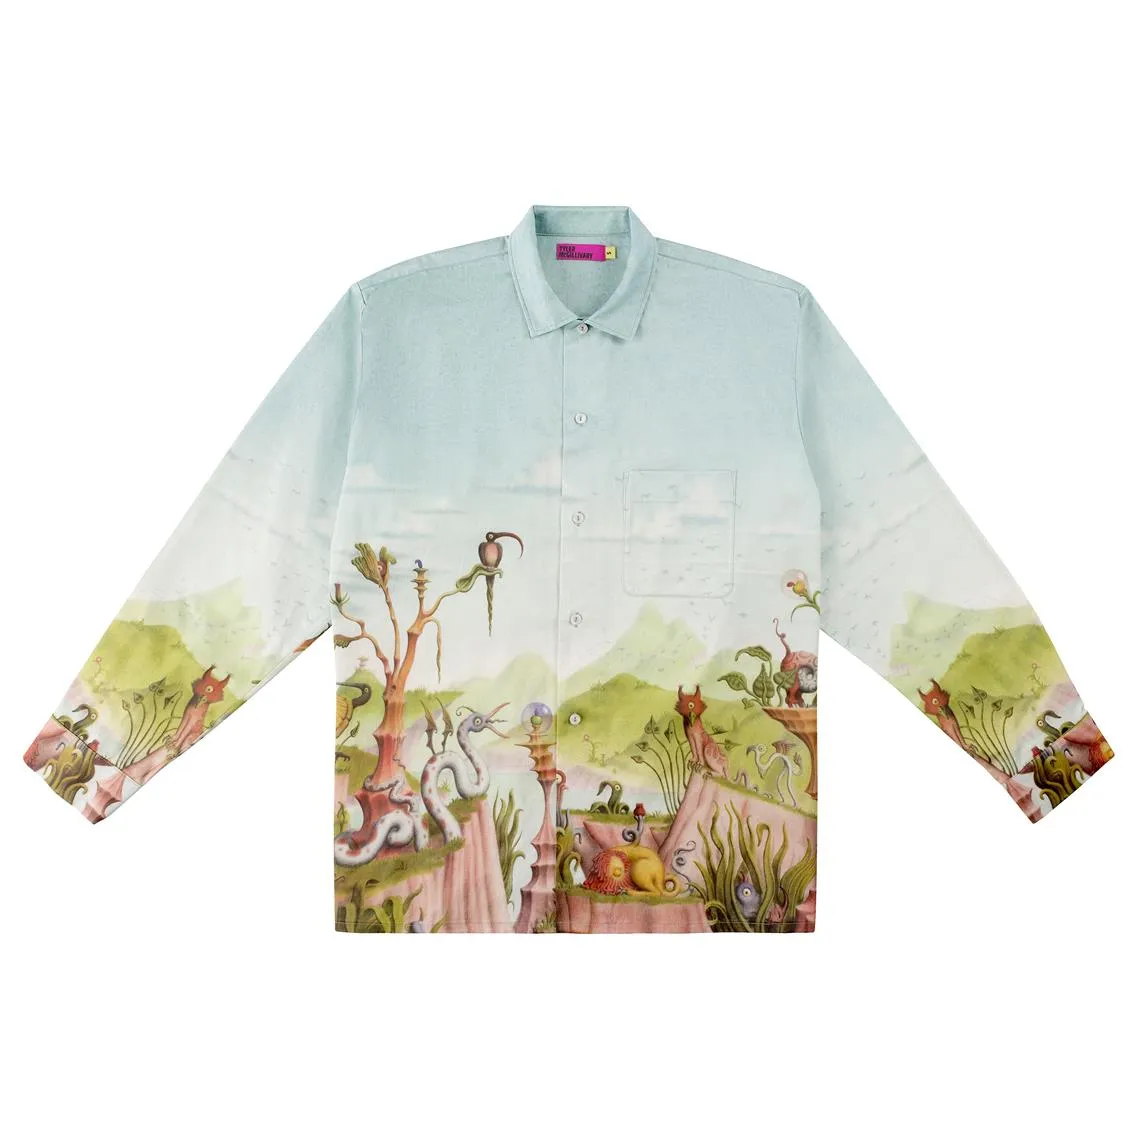
Products in Packaging Retouching Techniques
Packaging shots are crucial for industries like cosmetics, food, or household goods, where the packaging itself is a selling point.
- Correct Perspective: Use lens correction tools to ensure the packaging edges are straight and symmetrical.
- Clean Up Labels: Enhance text sharpness and ensure labels are legible without distortions.
- Add Depth: Use subtle shadowing techniques to give the packaging a three-dimensional look.
- Highlight Materials: Adjust lighting to emphasize unique materials like gloss, matte finishes, or transparent sections.
Metal Products Retouching (e.g., Kitchenware)
Metal products like kitchenware require precise adjustments to balance reflections and showcase the product’s quality.
- Manage Reflections: Use masking techniques to clean up harsh or distracting reflections while keeping natural highlights intact.
- Remove Fingerprints and Scratches: Retouch any blemishes on the metal surface for a flawless finish.
- Enhance Shine: Adjust brightness and contrast selectively to make the metal appear polished and premium.
Still Life eCommerce Photography Retouching
These images provide more room for artistic expression, but still need to maintain focus on the product. Techniques you should consider:
Adjust Light and Shadows
- Enhance Shadows: Add subtle drop shadows to ground objects naturally using a soft black brush with low opacity.
- Refine Highlights: Use the Dodge Tool to brighten light areas and emphasize product shape.
- Correct Imbalances: Use Gradient Masks to even out lighting across the composition.
Enhance Textures
- Sharpen Key Details: Apply the High Pass Filter selectively to emphasize textures like fabric, wood, or metal.
- Use Dodge & Burn to create volume with shadows and highlights.
Perfect Colors
- Global Color Correction: Adjust white balance, brightness, and contrast for overall consistency.
- Target Specific Areas: Use Hue/Saturation adjustments to refine individual product colors.
- Create Cohesion: Apply Gradient Maps or LUTs to harmonize tones across the image.
Remove Distractions
- Fix Small Imperfections: Eliminate tiny flaws using the Healing Brush or Patch Tool.
- Simplify Backgrounds: Blur or desaturate distracting elements to maintain focus on the product.
Add Subtle Creative Enhancements
- Light Accents: Add radial gradients or soft highlights to mimic natural light and guide attention.
- Play with colors but always preserve the original color of a product.

Photo Retouching Practical Tips for Beginners
Mastering eCommerce photo retouching takes time and practice, but following these practical tips can significantly streamline your workflow, enhance your results, and make the learning process smoother. Whether you’re just starting or transitioning into product photography, these strategies will help you work more efficiently.
Start with Non-Destructive Editing
Non-destructive editing ensures you can make changes or revert edits without damaging the original file.
- Use Adjustment Layers: Instead of directly altering the image, use Adjustment Layers for brightness, contrast, color correction, and more. These allow for flexible tweaks at any stage.
- Work with Masks: Apply Layer Masks to target specific areas for adjustments (e.g., sharpening the product while leaving the background untouched).
- Smart Objects: Convert your image into a Smart Object before applying filters or transformations. This way, effects like Gaussian Blur or High Pass sharpening remain editable.
Use Shortcuts and Presets to Save Time
Speed and efficiency are essential in eCommerce retouching, especially when working on large catalogs.
Learn Keyboard Shortcuts:
For Photoshop, common shortcuts include:
Ctrl+Z (Undo), B (Brush), L (Lasso Tool), Ctrl+Shift+Alt+E (Merge visible layers into a new layer). You can also customize shortcuts for frequently used tools to save even more time.
Create and Use Presets:
- Lightroom Presets: Save commonly used adjustments (e.g., white balance, exposure) as presets for batch editing.
- Photoshop Actions: Record repetitive tasks like resizing, exporting, or adding watermarks as Actions to automate them.
- Pro Tip: Keep presets organized by product type (e.g., apparel, jewelry) to ensure consistency across similar projects.
Keep the Original Image Intact
Always maintain an untouched copy of your original file for reference or future use.
- Work on Duplicates: Duplicate the original layer and apply edits on the copy, keeping the base layer intact.
- Version Control: Save multiple versions of your work as you progress (e.g., “v1_color_correction.psd,” “v2_textures.psd”) to avoid irreversible mistakes.
- Archive Original Files: Store raw files separately on cloud storage or external drives for easy retrieval.
- Pro Tip: Use non-destructive workflows in RAW editors like Lightroom or Capture One to preserve the integrity of the original image.
Study Professional Retouching Examples for Inspiration
Analyzing the work of experienced retouchers can provide valuable insights and help you develop your style.
- Observe Before-and-After Edits: Look for professional portfolios or online tutorials that showcase how raw images are transformed into polished eCommerce visuals.
- Pay Attention to Details: Study techniques like shadow refinement, color grading, or texture enhancement.
- Pro Tip: Take notes on lighting, angles, and editing techniques that make specific product images stand out.
Understand Platform-Specific Specs
Platform-specific requirements play a crucial role in eCommerce photography and retouching because each platform has unique rules and expectations for how images should appear. Understanding these requirements ensures your product photos meet technical standards and also perform well in attracting and converting customers.
Why Are Platform Specifications Important?
- Improves Professionalism: Images that don’t meet platform standards, whether due to incorrect sizes, aspect ratios, or poor alignment, can appear unprofessional and harm the brand’s and photographer’s credibility.
- Reduces Returns: Accurate, high-quality images tailored to platform specifications minimize the risk of customer dissatisfaction. Misleading visuals can lead to returns, which hurt both customer trust and profit margins.
- Saves Time and Effort: Retouching with platform requirements in mind prevents rework. If you know the specifications upfront, you can prepare images correctly from the beginning, avoiding rejected uploads or additional rounds of editing.
How to Incorporate Platform Requirements Into Retouching
- Plan Ahead: Research the platform’s guidelines before starting the shoot or editing process.
- Tailor Editing for the Platform: Adjust your workflow based on whether the platform favors clean product shots, lifestyle settings, or specific formats.
- Test Images: Preview your images on the platform to ensure they display correctly and make adjustments as needed.
When and Why to Outsource Retouching: Save Time, Get Better Results
Retouching is a critical part of eCommerce photography, but it can also be one of the most time-consuming and detail-oriented stages of the workflow. Knowing when to outsource this process can help you focus on your core strengths, deliver higher-quality results, and scale your business effectively. Here’s a deeper look at when and why outsourcing retouching can be the best decision for your photography projects.
When Should You Consider Outsourcing?
1. High-Volume Workloads
If you find yourself struggling to meet deadlines or handling bulk orders for eCommerce clients, outsourcing is a practical solution. Professional retouching studios can process large batches of images quickly and consistently.
2. Projects Requiring Specialized Skills
Certain product categories, such as jewelry, metallic objects, or intricate fabrics, demand advanced retouching techniques. Outsourcing to specialists ensures these images meet professional standards and reflect the product’s quality accurately.
3. Tight Deadlines
When clients need fast turnarounds, outsourcing allows you to deliver on time without compromising quality. Many retouching studios offer expedited services for urgent projects.
4. When Quality Is a Priority
Outsourcing is especially valuable when working with high-profile brands or clients with strict quality requirements. Professional retouchers can meet these standards with precision and attention to detail.
5. Lack of In-House Resources
If you don’t have the tools, software, or expertise needed for advanced retouching, outsourcing provides access to industry-leading technology and techniques without the investment.
Benefits of Outsourcing Retouching
- Scalability: Outsourcing allows you to scale your operations, handling larger or more complex projects without overburdening yourself or your team.
- Consistency: Retouching studios have workflows and quality control measures in place to ensure consistent results across all images.
- Access to Latest Tools: Professional retouchers use cutting-edge software and techniques to achieve superior results.
- Reduced Stress: Delegating tedious or complex tasks reduces your workload and helps you focus on what is most important for you and your business.
FAQ for Beginners about Commercial Photo Retouching
What essential tools do beginners need for effective photo retouching?
You’ll need reliable software (like Adobe Photoshop for detailed edits, Lightroom for batch processing, and Capture One for advanced color control), a high-resolution and color-accurate monitor, a graphics tablet for precision, a fast computer, and neutral, daylight-balanced lighting for your workspace.
How should photographers organize their retouching workflow?
Start by calibrating your monitor and optimizing your workspace. Organize files by client or project, use consistent naming conventions, and back up your work with external drives or cloud storage. Dual monitors and a clutter-free editing station can further improve efficiency.
What are the key steps in the eCommerce product photo retouching process?
- Calibrate your monitor and set up your editing environment.
- Select the best images from your shoot.
- Isolate the product from the background using precise selections and masks.
- Align and crop images to meet platform requirements and enhance visual appeal.
- Adjust white balance, exposure, and color to ensure accuracy and consistency.
- Use healing and cloning tools to eliminate dust, scratches, and blemishes.
- Sharpen and use dodge & burn for depth and realism.
- Clean up or replace backgrounds, add shadows or gradients for a professional look.
- Refine highlights, shadows, and reflections for realism.
- Save images in the required formats and sizes for different eCommerce platforms.
Why is color accuracy and consistency so crucial in eCommerce photography?
Accurate colors ensure that what customers see online matches what they receive, reducing returns and increasing satisfaction. Consistency across a catalog strengthens brand identity and professionalism.
How can batch processing and style guides help photographers?
Batch processing in Lightroom or Capture One speeds up global adjustments (like exposure or white balance) across many images. Referring to brand style guides ensures your edits align with the client’s visual standards.
What’s the risk of over-editing product photos?
Over-editing can make products look unrealistic, leading to disappointed customers and higher return rates. Subtle, natural enhancements build trust and credibility.
How should photographers handle exporting for different platforms?
Export images in the formats and sizes required by each eCommerce platform. Use compression tools to reduce file size without sacrificing quality, and always keep master files for future edits.
What’s the bottom line for beginners in eCommerce product photo retouching?
With the right tools, organized workflow, and attention to detail, beginners can create professional, market-ready product images. Mastering these retouching techniques will not only improve your photos but also help your clients succeed in the competitive world of online sales.

