
How to Photograph Handbags: From Setup to Creative Ideas
Bags come in all shapes, sizes, materials, and moods. From a structured leather crossbody to a soft suede tote, each type requires a different approach. Lighting shifts. Angles matter. What works for a luxury handbag falls flat on a sporty backpack.
This guide covers the fundamentals and the creative decisions — setup, lighting by material, styling, backgrounds, on-model direction, and post-production. Whether handling a DIY shoot or producing images for high-end clients, the principles apply at every level.
Part of our complete guide: Handbag & Bag Photography for eCommerce Stores, Marketplaces, and Social Media
Bag Photography Setup Essentials for a Flawless Start
Before you even turn on the lights, your setup needs to be dialed in. A clean, intentional setup doesn’t just make your life easier; it saves hours in post and keeps your shots consistent across a collection.
Gear That Works. From Pro Setups to DIY Bag Photography
Camera: A full-frame DSLR or mirrorless camera handles most bag photography well. For high-end clients or large-format print work, medium format gives extra sharpness and tonal range. For a full camera comparison by sensor type: Best Cameras for Product Photography
Lens: A 50mm or 85mm prime lens gives natural proportions without distortion. Primes deliver better sharpness than zooms at comparable apertures. A tilt-shift lens helps correct perspective distortion when shooting bags from above. For the full lens guide: Best Lens for Product Photography
Tripod: Keeps the frame consistent and allows tethered shooting without juggling equipment.
Tethering setup: Reviewing images on a screen during capture catches shape issues, folds, or dust early — before they accumulate across a session.
Clamps and stands: Use them to hold straps, open flaps, or lift details like keychains or tags into position.
Soft weights or foam inserts: These help shape bags without appearing in the frame.
For DIY bag photography, substitute with natural light near a window, a foam core reflector, and a white paper sweep. The goal is the same: control the shape and eliminate distractions.
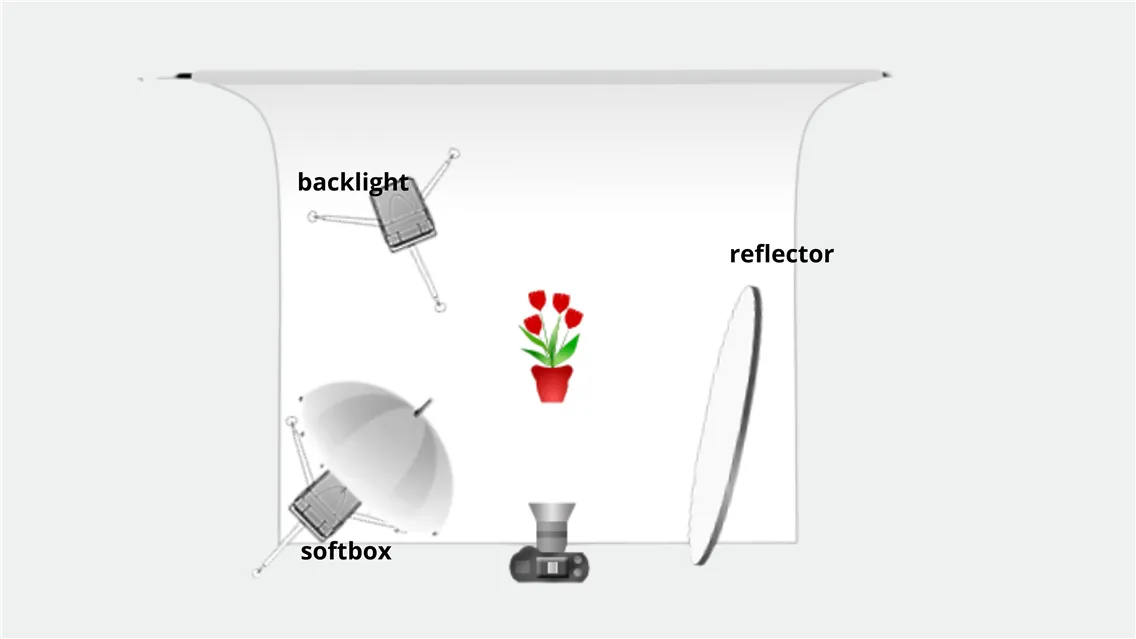
Studio lighting
Start with this baseline setup and adjust from there:
- One large softbox from the front-left or front-right
- A second light or reflector to fill the opposite side and soften shadows
- A top light or backlight to separate the bag from the background
Soft, diffused light keeps straps from casting harsh shadows, smooths curved surfaces, and gives more room in post. Use softboxes, umbrellas, or sheer diffusion fabric to control the light quality.
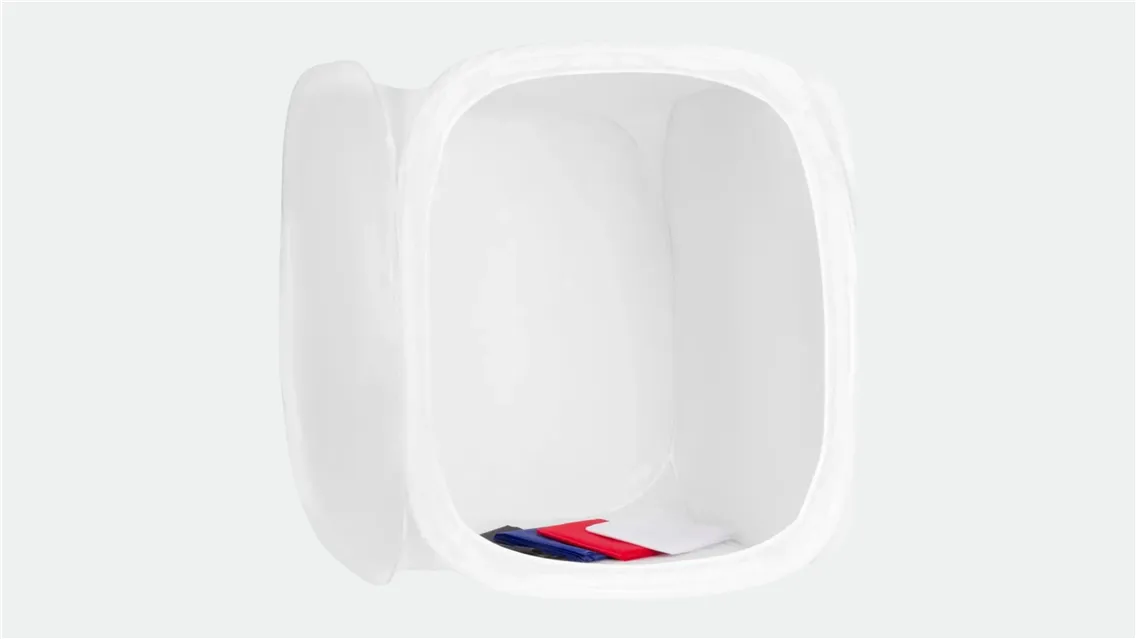
For reflective bags with patent leather or metallic finishes flag off parts of the lights or build a quick diffusion tent to avoid unwanted reflections. Material-specific techniques follow below.
Soft light is your friend. It keeps straps from casting harsh shadows, smooths out curved surfaces, and gives you more control in post. Use diffusion like umbrellas, softboxes, or even sheer fabric, to tame the light. For starters, consider buying or DIYing a lightbox for a controlled environment.
For reflective bags, like patent leather or metallic finishes, you'll want to flag off parts of your lights or build a quick diffusion tent to avoid ugly reflections. We’ll dive deeper into material-specific tricks later on.
One more thing: don’t ignore the background. A clean white or off-white sweep is the standard for e-commerce, but creative campaigns may call for texture, color, or depth. Your lighting setup should account for that from the start.
For a comprehensive guide to lighting setups, modifiers, and how light interacts with different surfaces: Essential Lighting Setups for Product Photography
Prepping the Bag and Capturing Core Angles
Shaping and cleaning
How a bag holds its shape defines the shot. A luxury tote that slouches too much reads as inexpensive. A rigid backpack that leans forward looks unstable.
Use tissue paper, packing foam, or rolled-up fabric to fill the inside without overstuffing. Support the bottom panel with a piece of cardboard or thin foam if it begins to sag. Lift handles and straps with thin wires or fishing line taped to a C-stand or held just out of frame. Drooping straps make a bag feel lifeless.
Wipe everything down before shooting. Use a lint roller on canvas or suede. For leather, a microfiber cloth removes surface dust. Polish metal hardware if needed. Studio lights amplify dust more than natural light does.
Core angles
These are the shots buyers expect to see on a product page or catalog:
- Front view — centered, symmetrical, head-on
- 45-degree angle — adds depth, shows both front and side panels
- Side view — essential for structured or accordion-style bags
- Back view — often skipped, important for detailing and branding
- Top-down — shows closures, zippers, and compartments
- Interior shot — open the flap and light it well; use a small reflector inside if needed
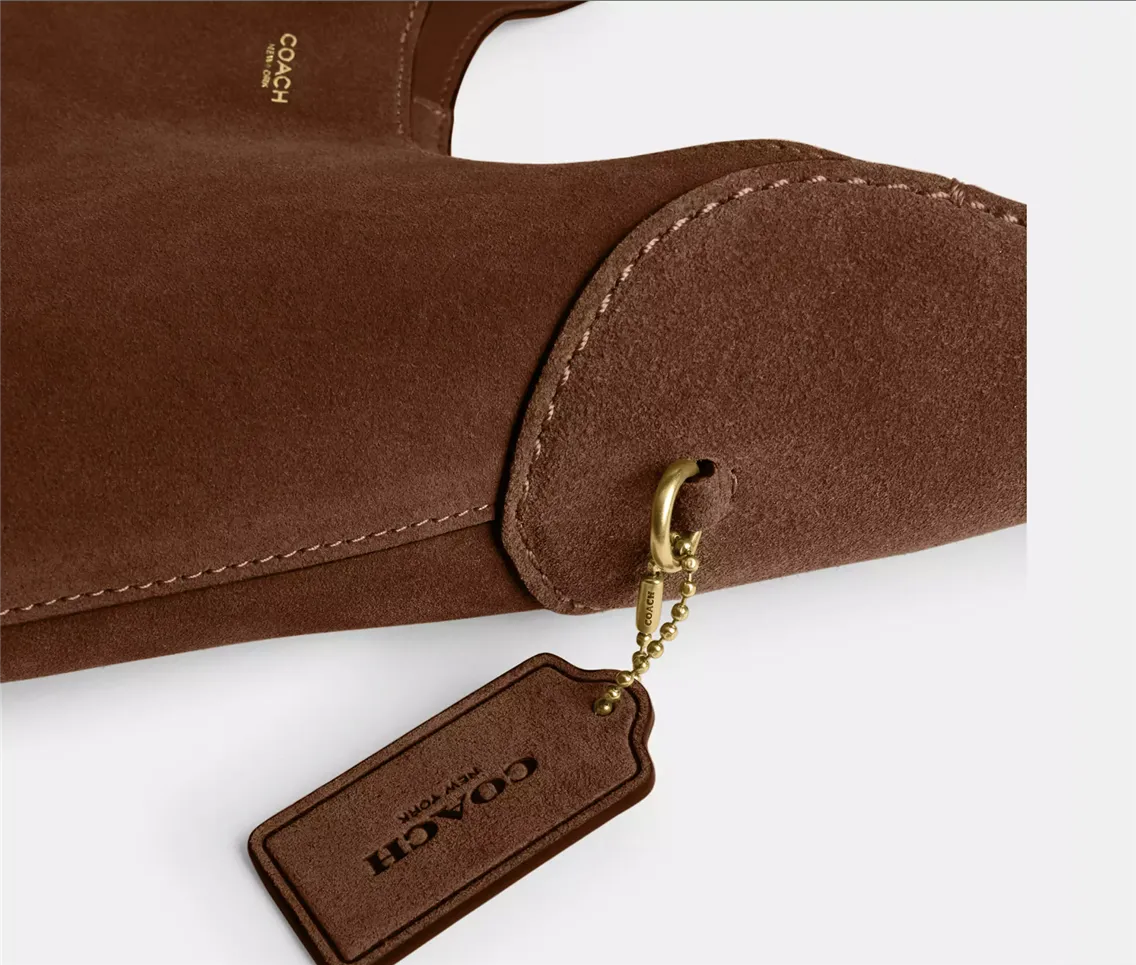
- Detail close-ups — logo, stitching, zipper pulls, lining texture
Keep framing and camera height consistent across different models in a collection. If the front view of one bag is angled slightly down and another slightly up, it breaks the visual consistency of a website grid.
And always check symmetry. Tiny tilts look huge in product photography. Use a level or digital grid to keep everything square.
Adapting Professional Light to Form and Material for Bag Photography
You can’t light every bag the same way. Shape and surface dictate how light behaves, and if you ignore that, the photo falls apart. Gloss flares. Suede flattens. Soft bags sag. If you're aiming for consistency and quality, the form and material have to lead your setup.
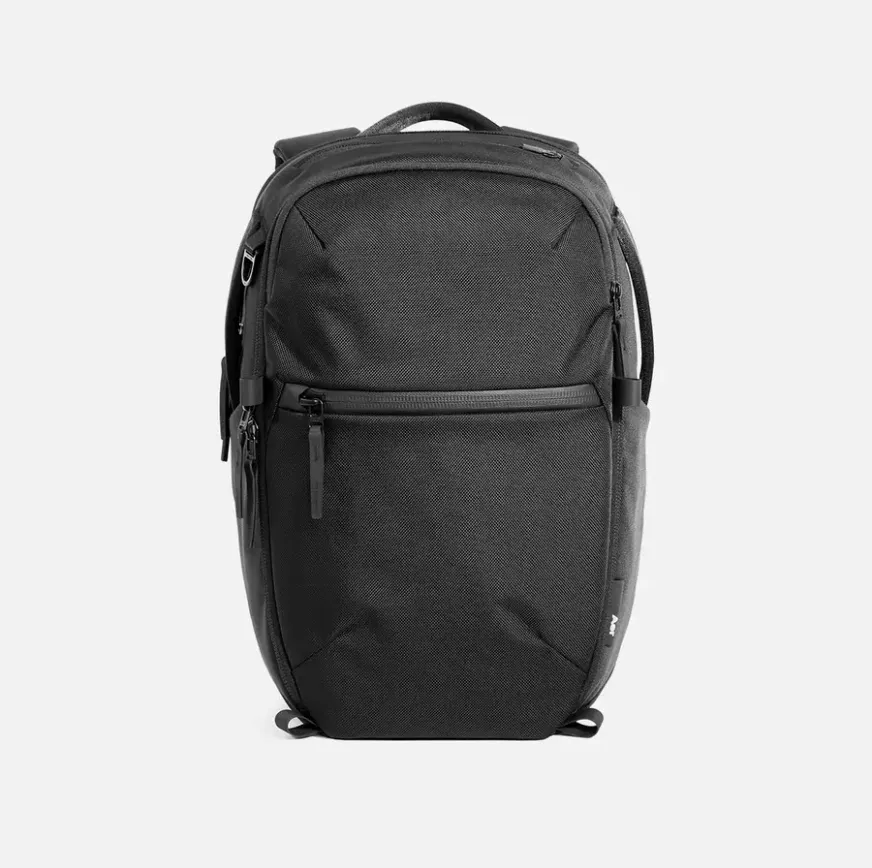
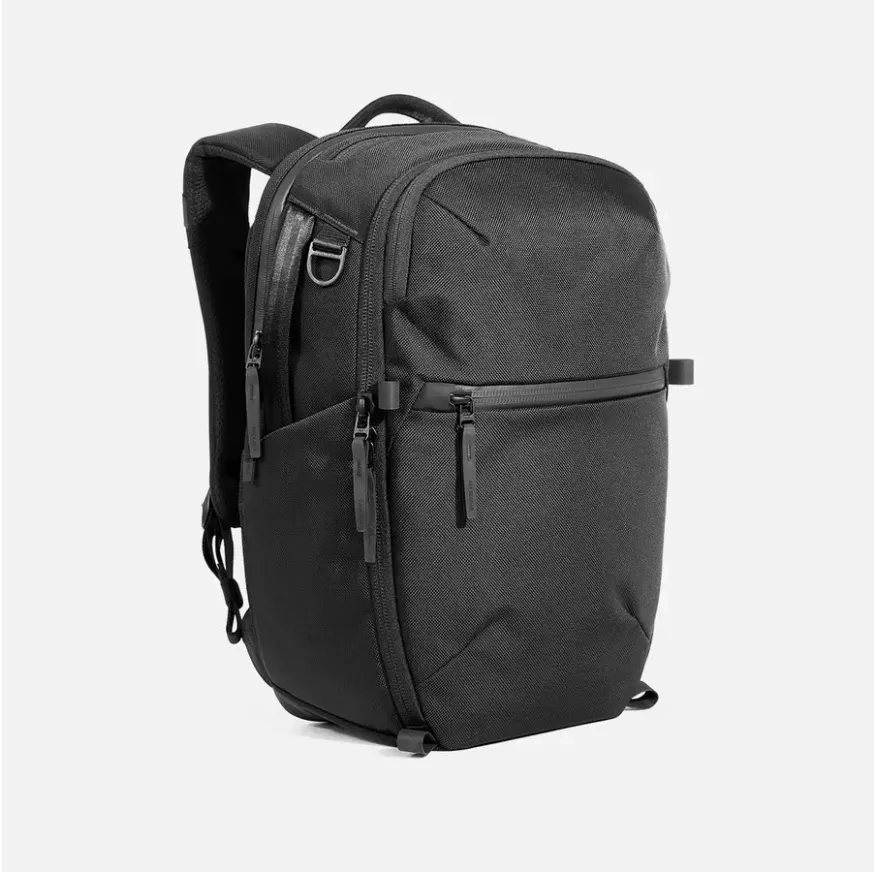
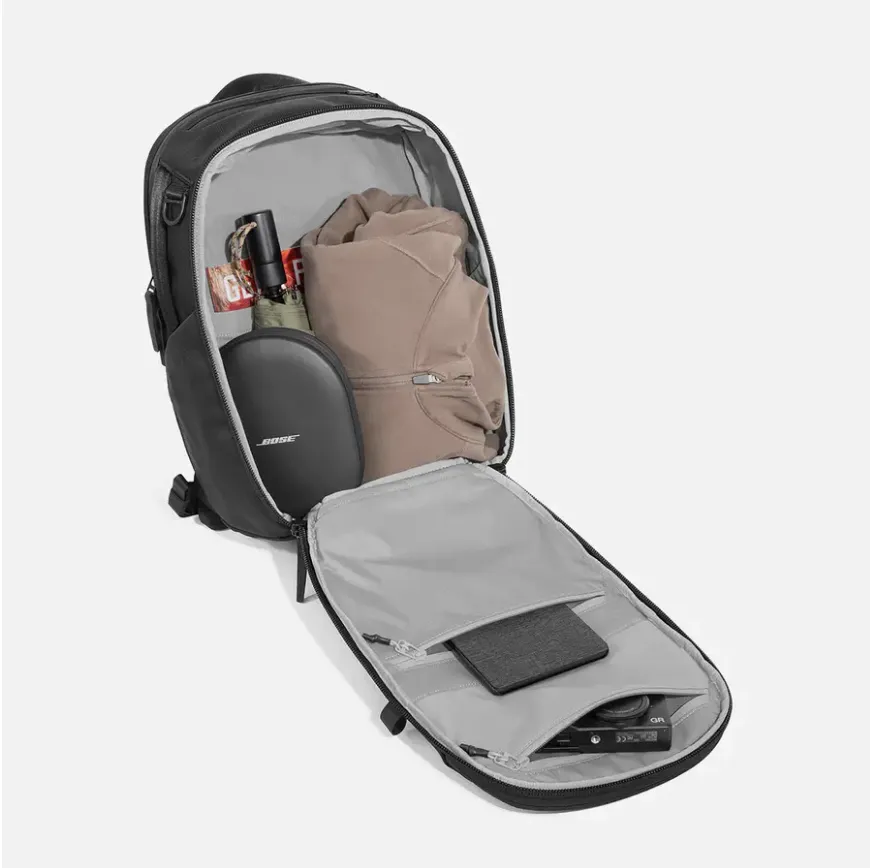
Backpack Product Photography: Show Structure and Utility
Backpacks are less about elegance, more about purpose. So shoot them like gear: sharp, intentional, no drama.
Keep it upright. Fill it with foam or soft props to support the shape. Never let it sink or slump.
Clean the silhouette — hang or tape the straps neatly. If the model wears it, don’t let the straps twist or pull.
Light evenly. One key light, one fill, both soft. Avoid strong side lighting unless it’s a campaign shot.
Show the function: zippers open, compartments visible, lining lit.
Great reference: Aer, Bellroy, or Rains. Clean, matte, and focused. No distractions. Just smart lighting on well-prepped gear.


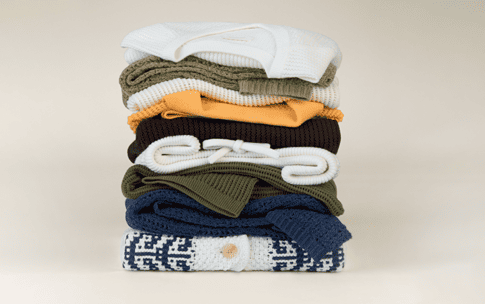
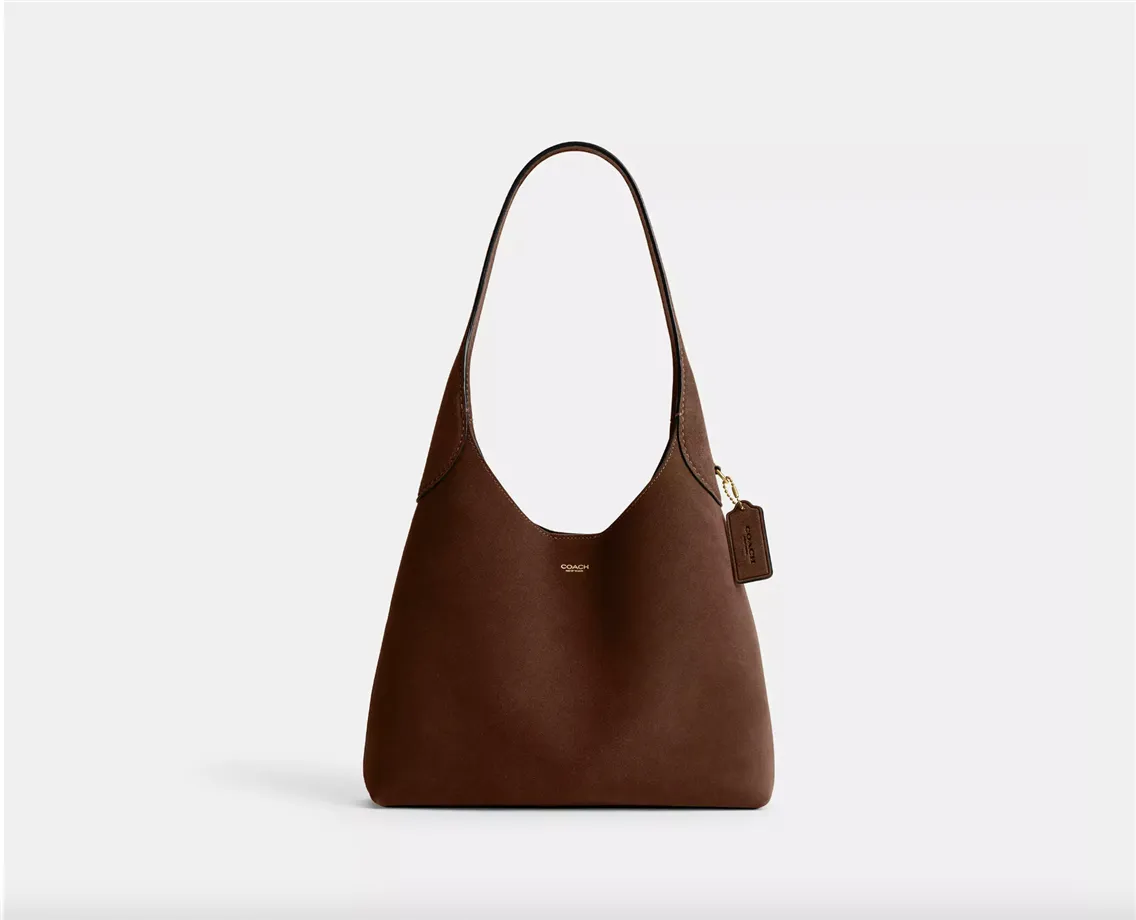
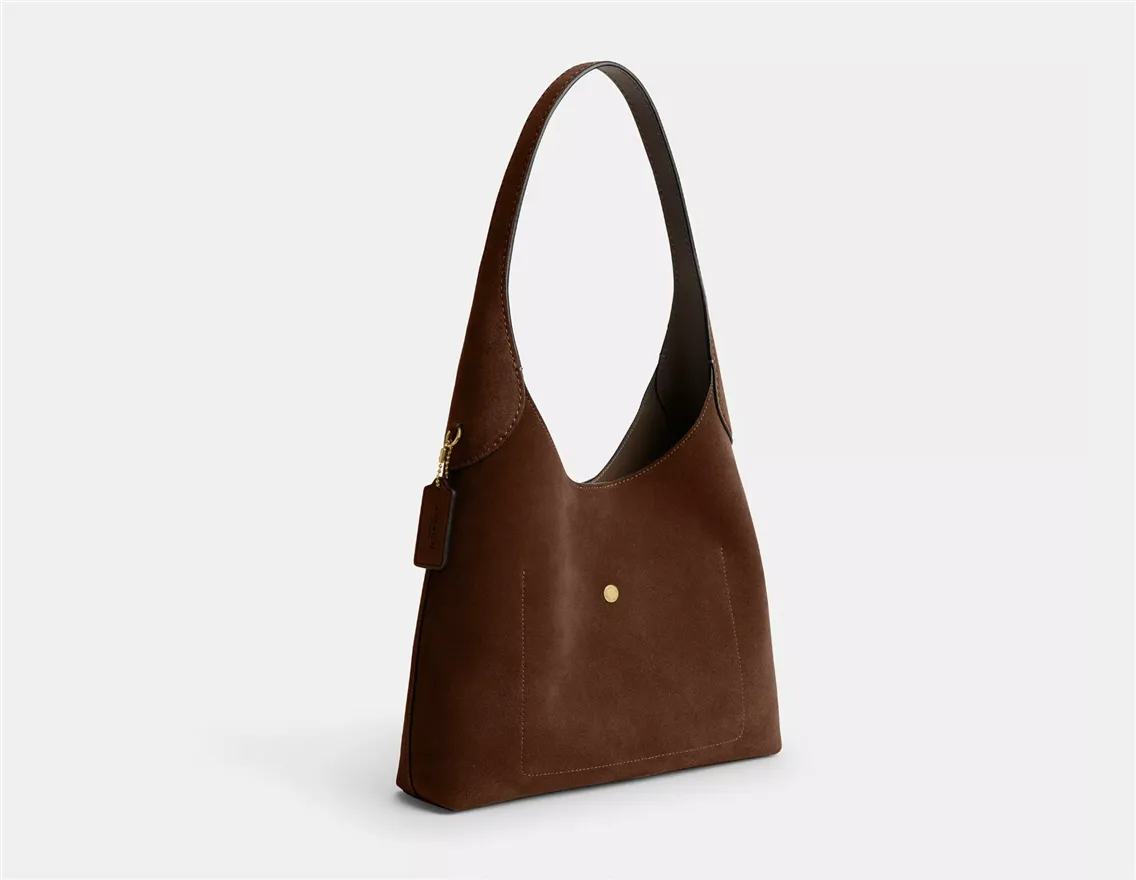
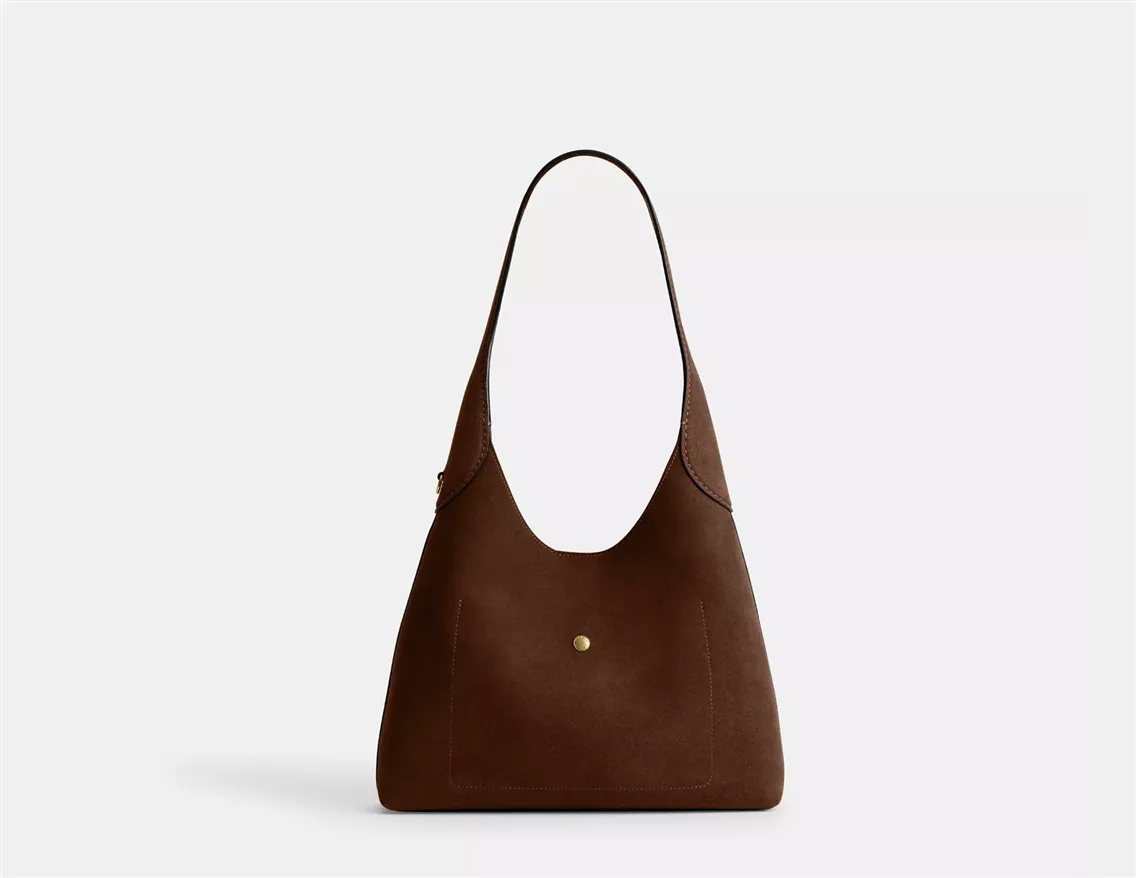
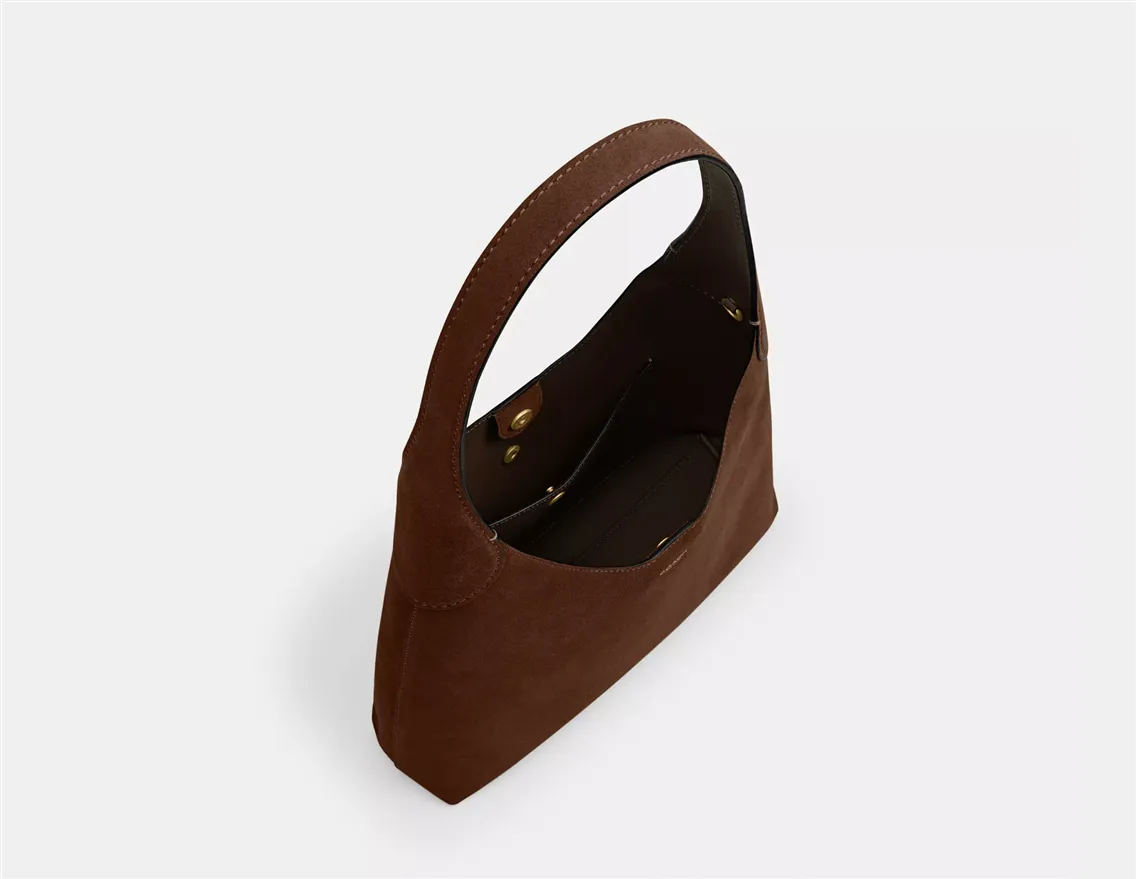
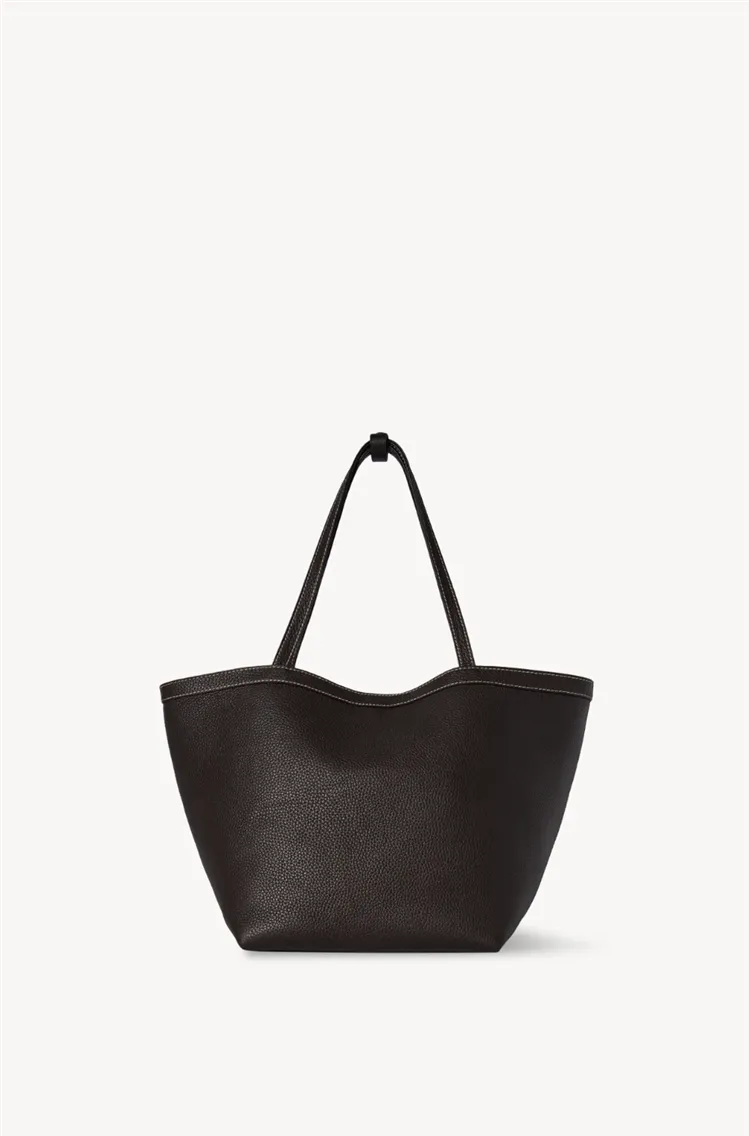
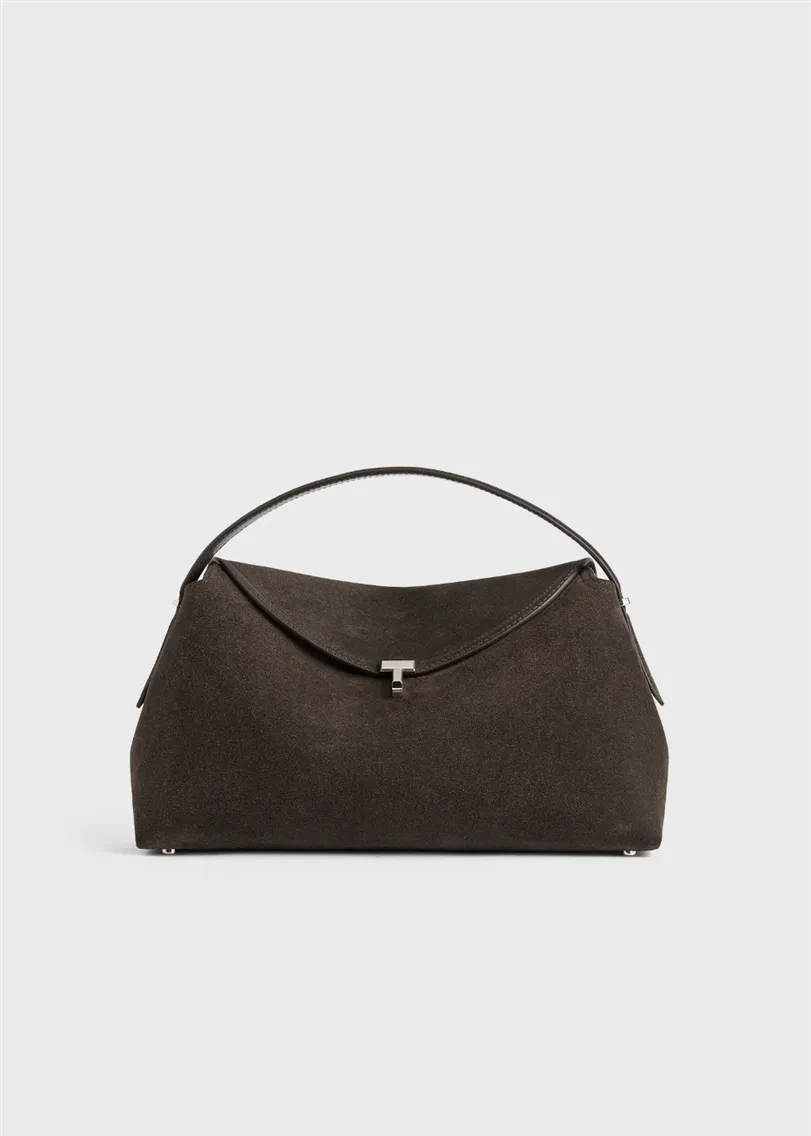
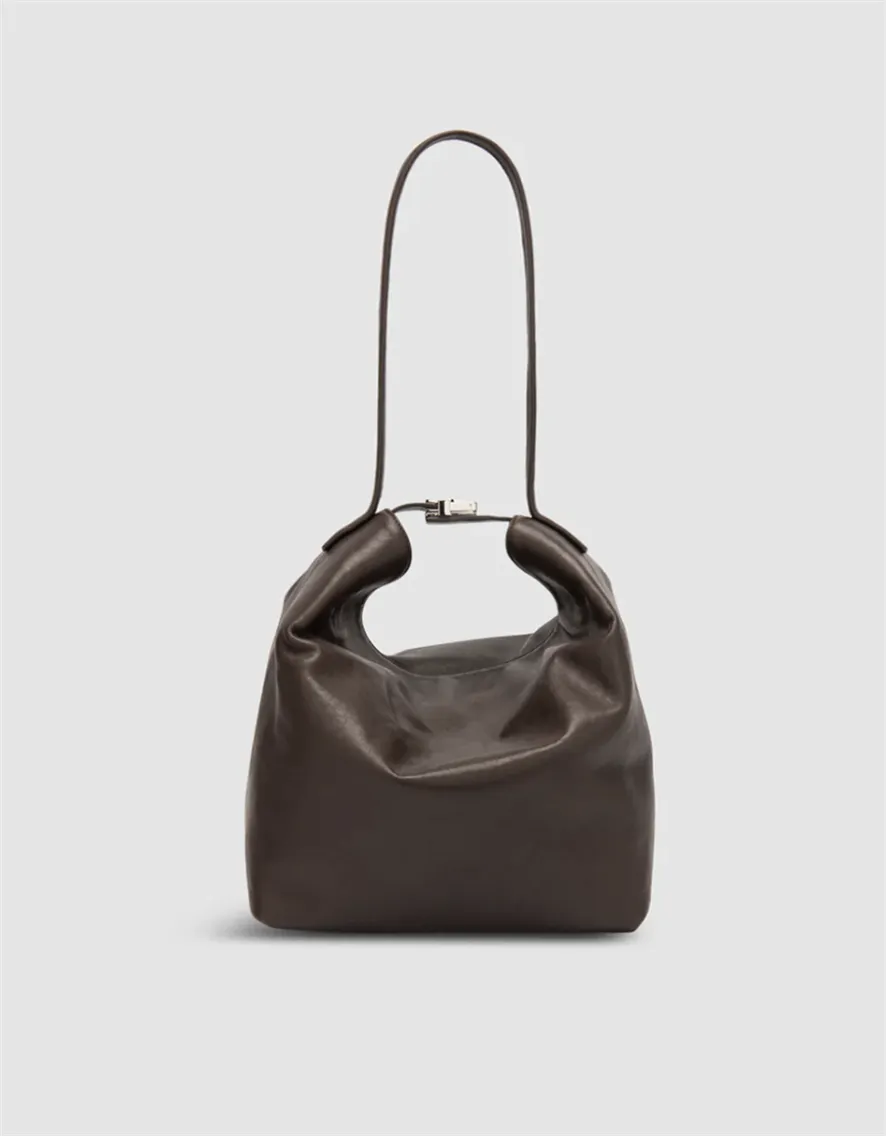
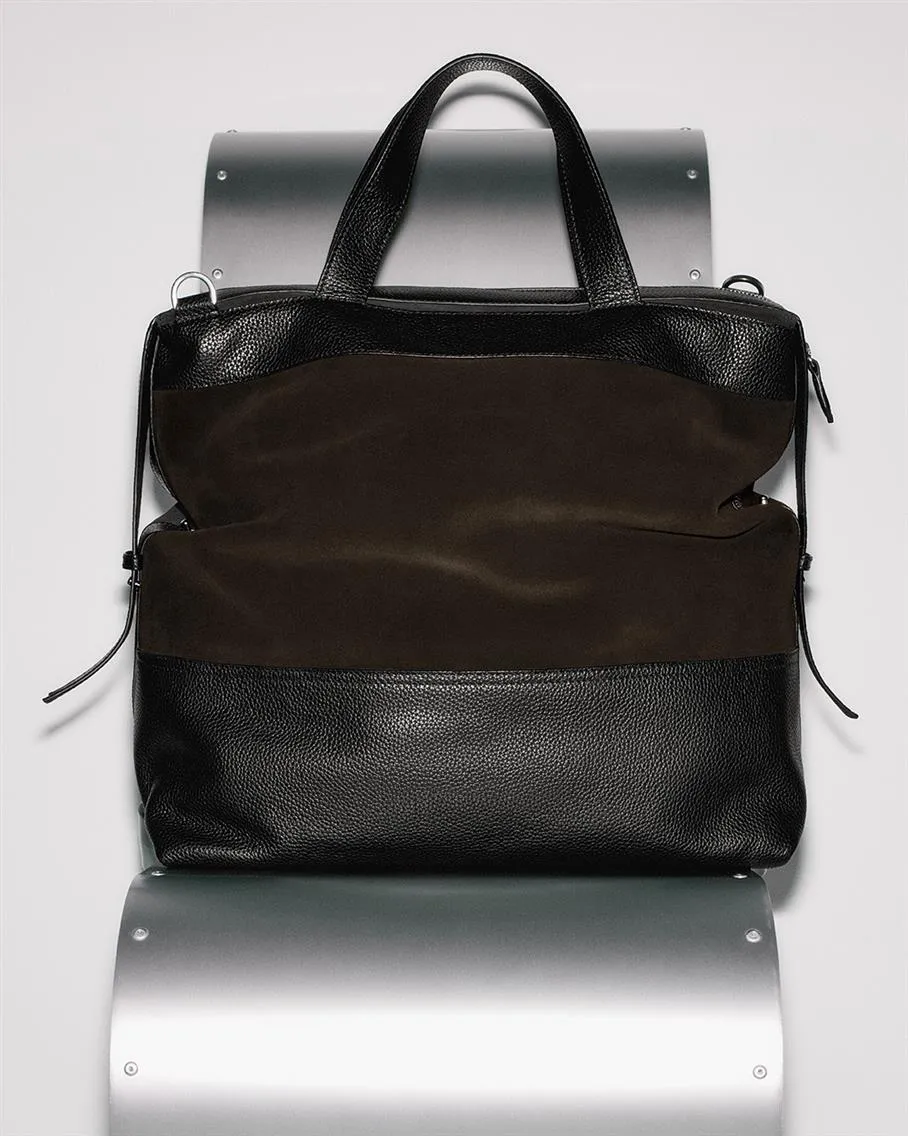
Suede and Soft Leather Bags: Avoid the Flat Look
Suede eats light. Matte finishes look dull without proper direction. If you don’t shape it with care, the bag dies on camera.
Use soft side lighting, not frontal. That way, the texture comes alive. Keep contrast low, suede isn't about high-shine drama. You want gentle shadows, not deep cuts. Don’t manhandle the bag; every press of a finger leaves a mark. Lint rollers and gloves save retouch time.
Support slouchy shapes from below. Don’t try to fake structure, show the softness, but make sure it doesn’t collapse. Think The Row or Toteme. Their softness is calculated. Relaxed, not sloppy.
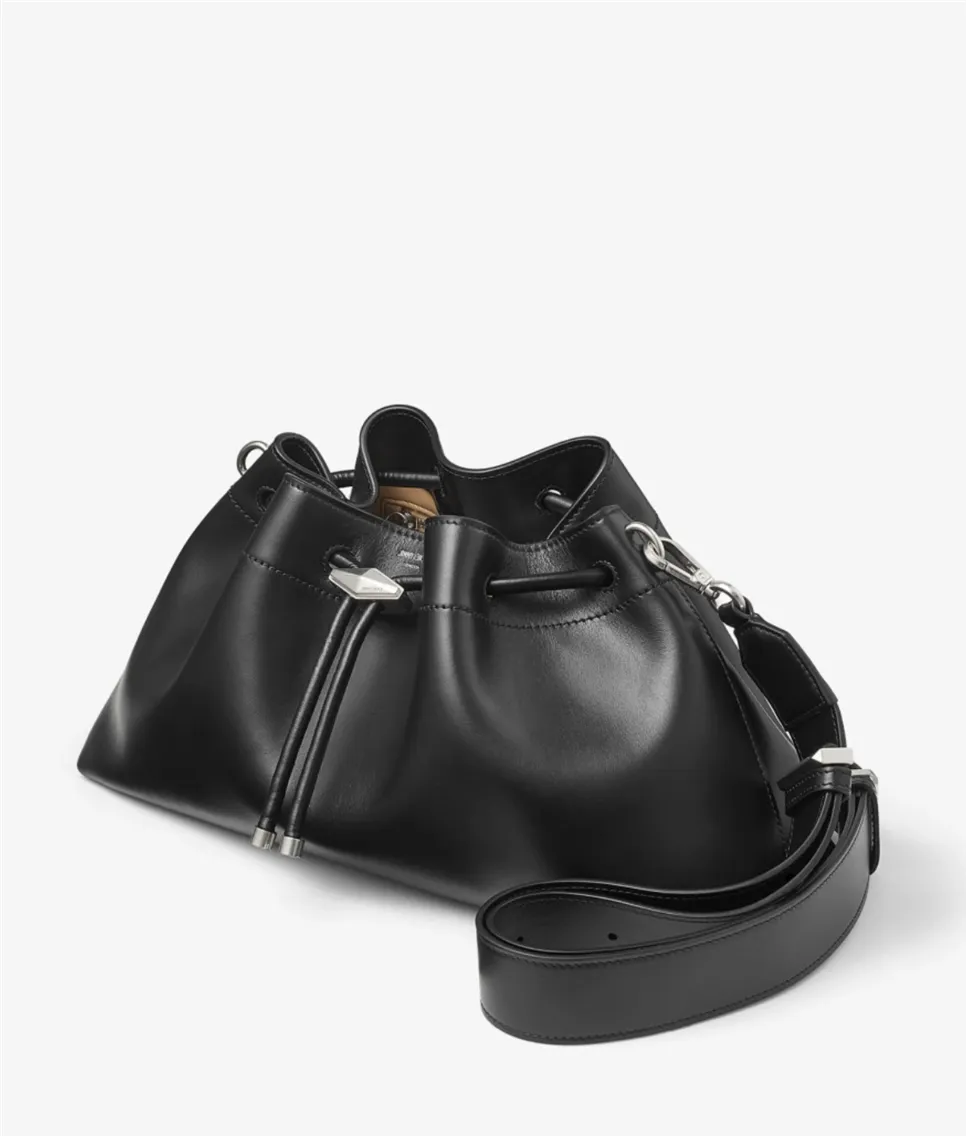
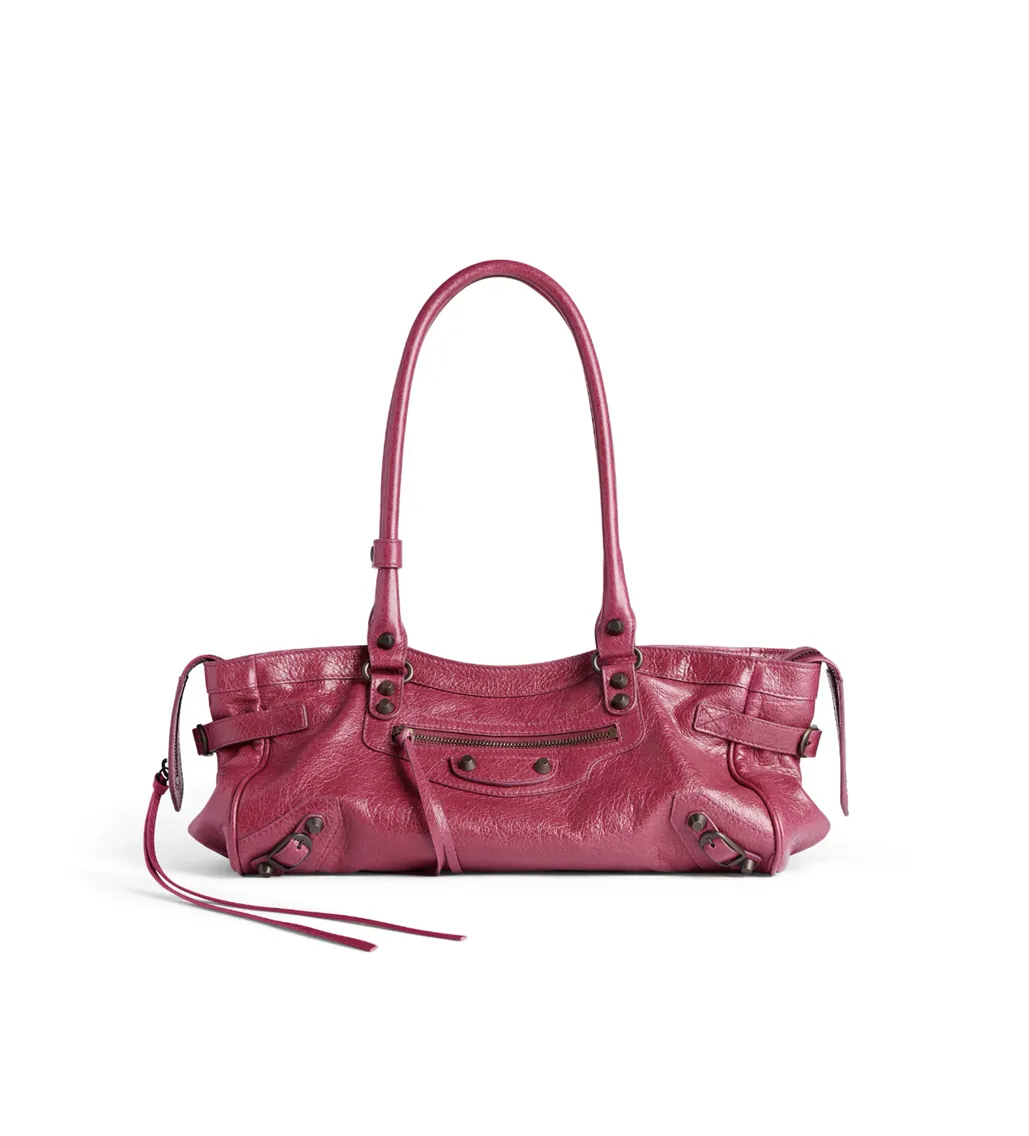
Handling Gloss and Reflective Surfaces in Bag Product Photo
High-gloss leather and patent finishes love to misbehave. But if you know how to control reflections, they become your edge.
Use a large diffused source like a softbox or bounce board. The bigger the light, the cleaner the highlight. Add flags or black cards to sculpt the gloss. Gloss sells luxury. Don’t over-matte it. Watch for hot spots on metal logos or chain straps. Adjust the angle or use smaller diffused fills for detail areas. A polarizer may help, but don't rely on it. Sometimes it kills the highlight too much. It’s better to manage angles instead.
Look at Jimmy Choo, By Far, or Balenciaga product shots. Reflections are deliberate, graphic, and symmetrical. Clean highlight lines show control.
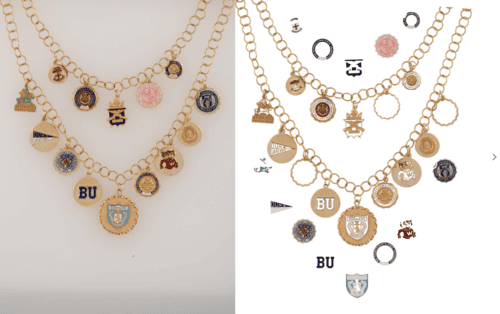
Backgrounds and Styling in Bag Still Life Photography
Once you’ve nailed the basics, it’s time to move beyond white sweeps and show some personality. Backgrounds and styling can completely change how a bag feels, casual vs. luxury, trend-forward vs. timeless, urban vs. romantic. And if you’re shooting campaign or editorial work, this is where your creative eye shines.
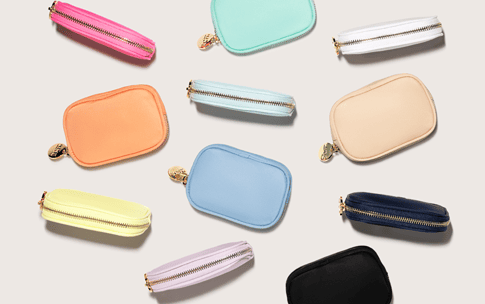
Bag Photography Backgrounds That Carry Meanings
If you're shooting a suede tote for The Row, you wouldn't place it on bubblegum pink acrylic. Not because it's wrong technically, but because it breaks the mood. Luxury brands sell restraint. Tension. Quite expensive. The background has to whisper that.
A pale floor, soft shadows, maybe a linen drape with just a ripple. That’s what works. Look at The Row's campaign stills. Most have no props, just space and light. The environment feels expensive because nothing is trying too hard.
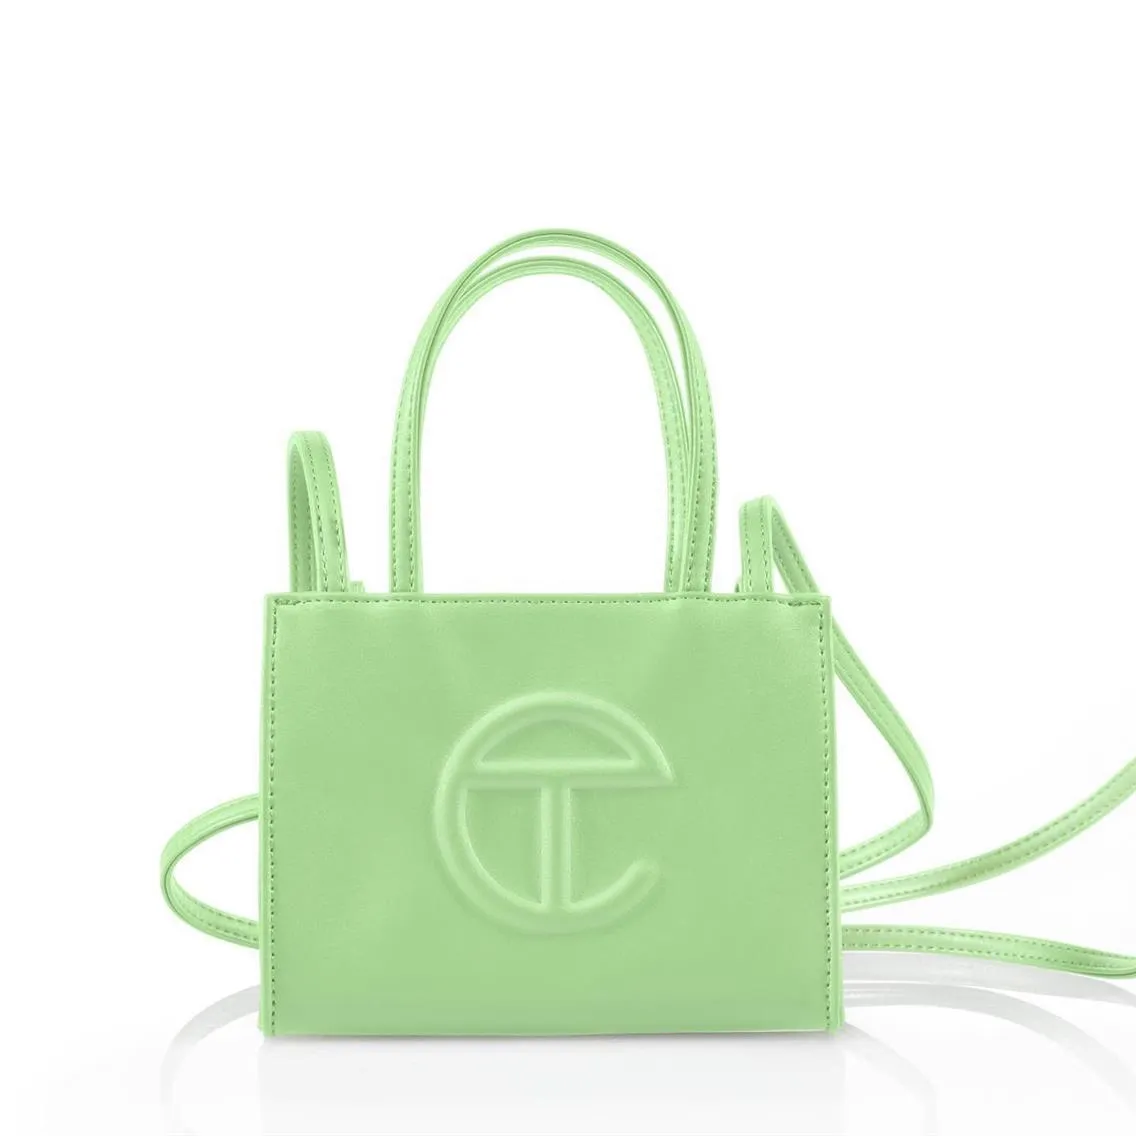
Now compare that to Telfar. Bright, seamless color backgrounds, sharp shadows, often styled flat or held by real people. Their bags are loud, democratic, joyful. The background is a billboard. It helps the bag yell on purpose.
COS goes to clean architectural textures. Neutral palettes. Slight asymmetry. The background becomes an extension of product design, form, and function in visual language.
For a deeper look at how background and color choices communicate brand positioning: Visual Branding for Jewelry Companies
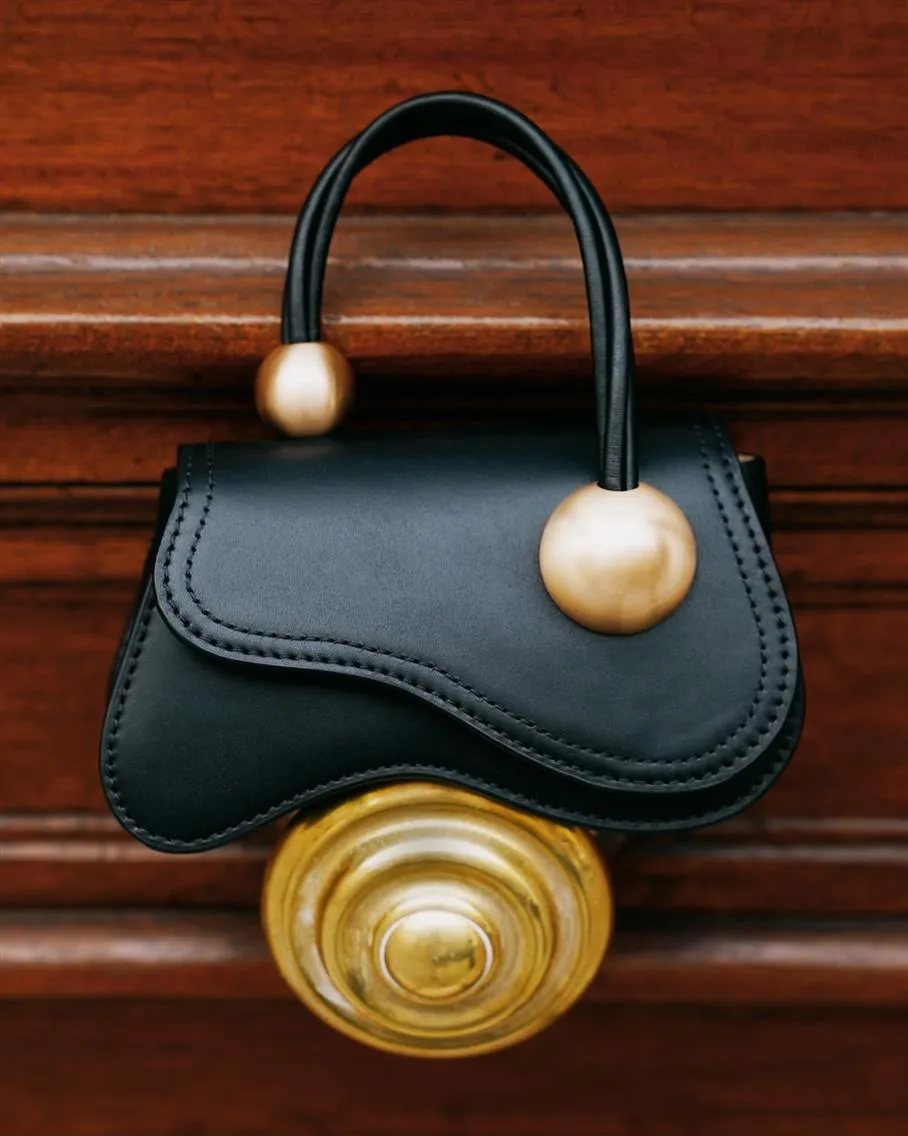
Creative Bag Still Life Photography Ideas that Align with Brand Psychology
Props are dangerous. One wrong object, and the bag suddenly feels like it's part of a bad ad setup for a kitchen appliance. That’s why great styling doesn’t mean more. It means precise.
| Mansur Gavriel uses barely-there props. Maybe a lemon, maybe a finger pulling open a bag. It feels like a still from a morning. Their color language is soft but optimistic. Their props suggest a lifestyle where the bag is the quiet star. | 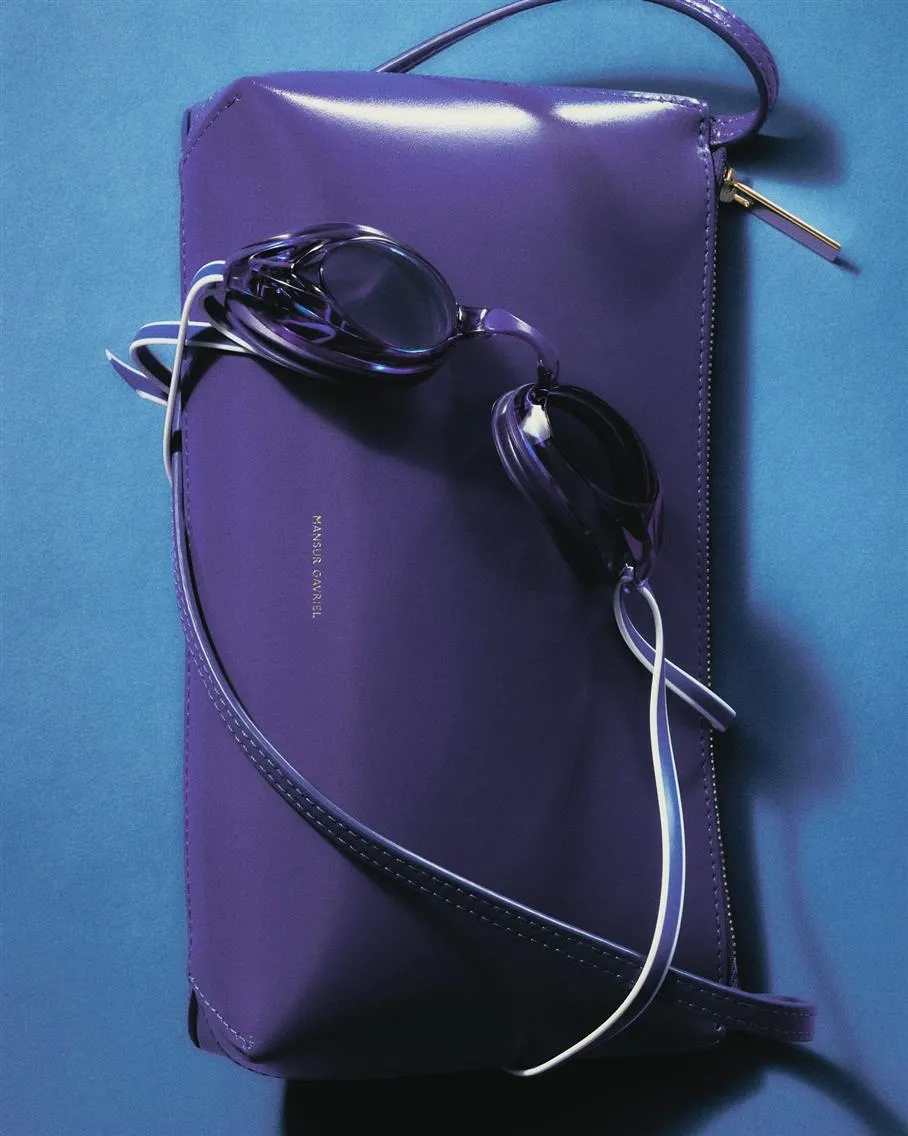 |
 | Cult Gaia takes the opposite route. Props become sculpture. Their bags sit on travertine blocks, next to alabaster fruits, in golden-hour light. It's still life as fantasy. The goal is to place the bag in an imagined, elevated world. |
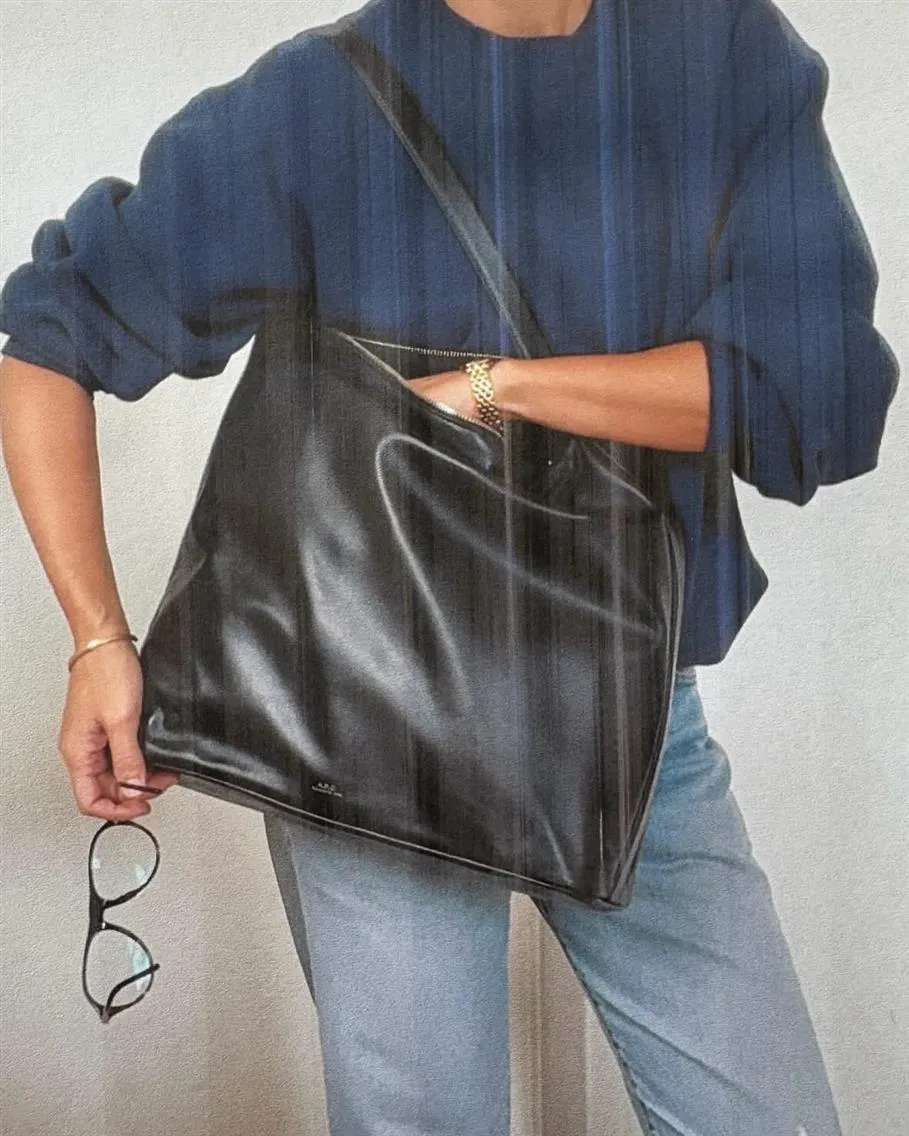
| A.P.C. loves gesture. Half-worn bags, models cropped at the shoulders, straps mid-swing. The still life isn’t still, it moves, breathes. There’s always a sense that someone just walked into the frame or just walked out. | 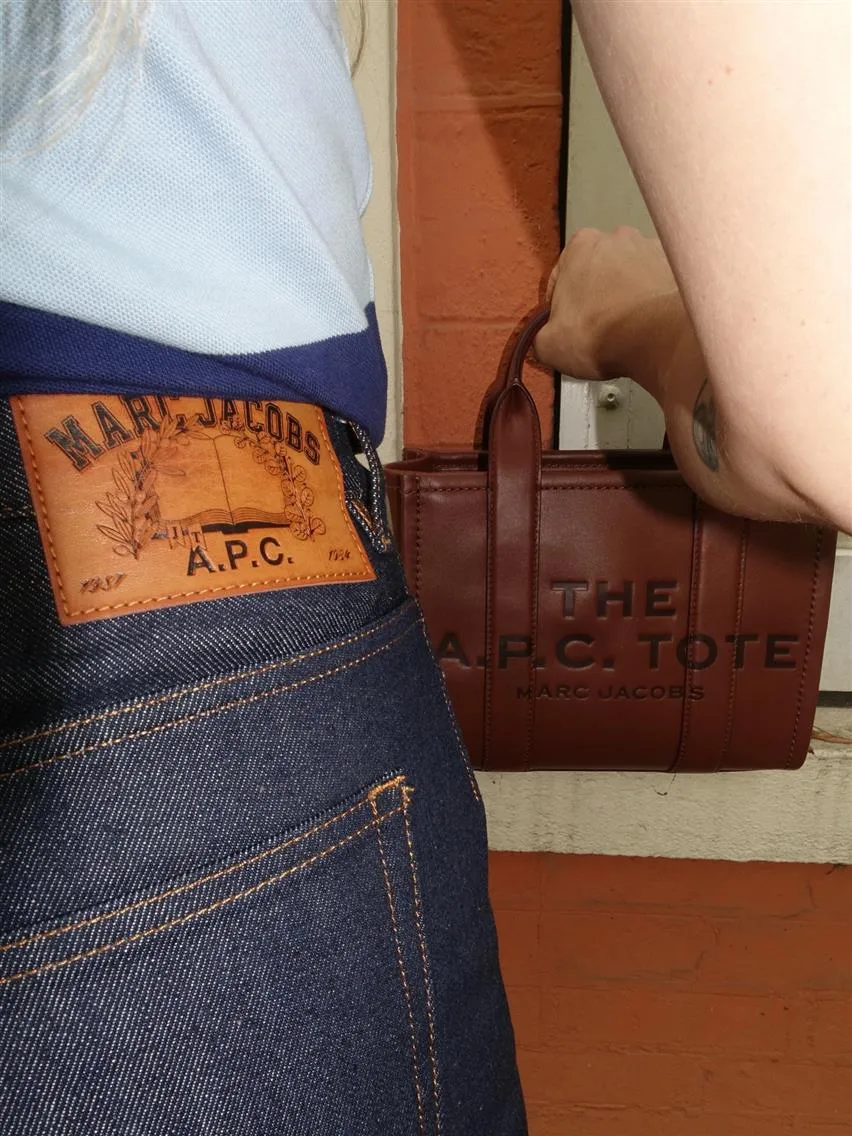 |
When choosing props, the question is not color — it is character. Who owns this bag? What city are they in? What do they wear with it? The answers determine what belongs in the frame. Full guide on still life photography: Still Life Photography for Fashion and Jewelry Brands
Catalog Bag Photography vs. Editorial and Socials
Understanding where images will live determines how they should be shot.
Catalog and eCommerce — consistency and clarity above everything. Pure white or very light gray backgrounds, centered compositions, and a full set of front, side, back, interior, and close-up shots aligned on a grid. This is essential for platforms like Amazon or Farfetch where structure and detail drive conversions.
Luxury editorial campaigns — photography creates desire rather than documents product. Lighting can be dramatic, compositions more fluid, backgrounds more atmospheric. Bags might be partially cropped, blurred, or shadowed to evoke mood rather than show the product clearly.
If you are building a body of work across these contexts and thinking about editorial clients specifically: How to Shoot for Fashion Magazines: The Roadmap to Vogue
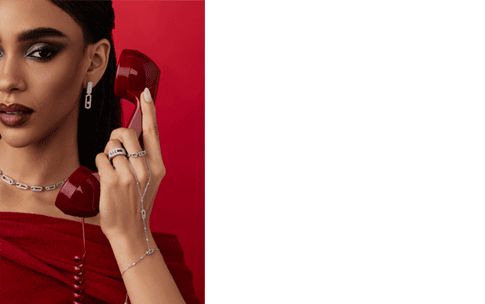
Social media — fast impact and scroll-stopping visuals. Tight crops, punchy backgrounds, dynamic styling. A hand entering the frame, a bag caught mid-drop, straps caught in motion. These images spark curiosity in ways that static catalog shots cannot.
For the complete guide to bag photography across all three contexts — including marketplace compliance requirements and social media strategy by platform: Handbag Photography for eCommerce, Marketplaces, and Social Media
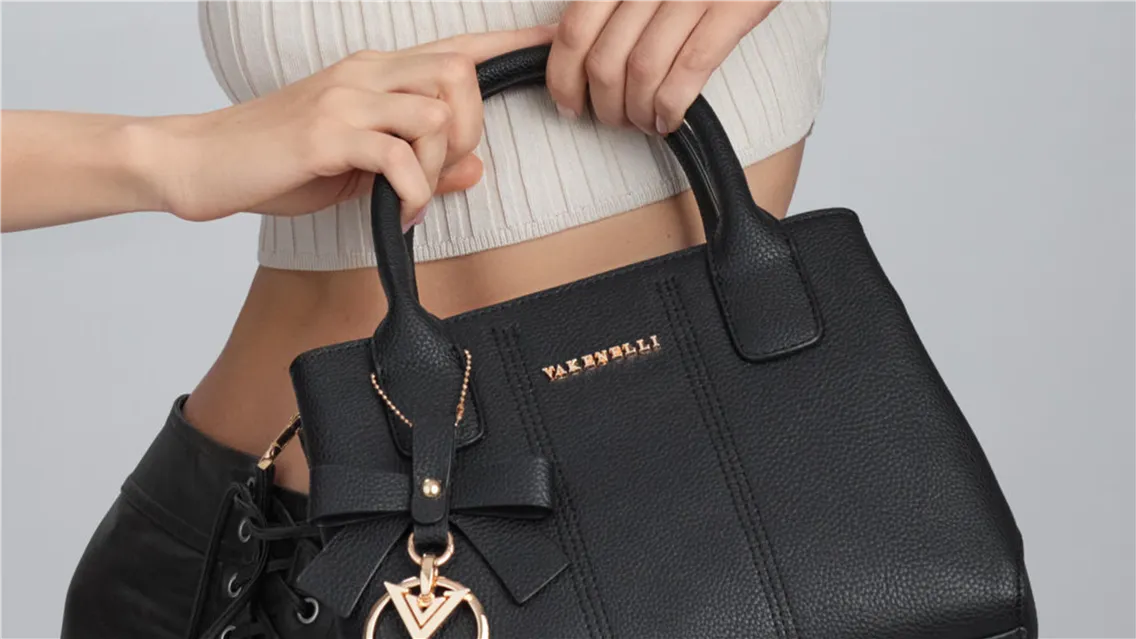
On-Model Bag Photography
Putting a bag on a person, even partially, gives it context. It tells the viewer how it moves, what size it is, and more importantly… who it belongs to.
Posing Bags on Models: From Utility to Desire
Every pose has a point of view. Holding a bag loosely at the side feels different than clutching it tightly to the chest. Slinging it over one shoulder says one thing. Crossing the strap across the body says something else entirely.
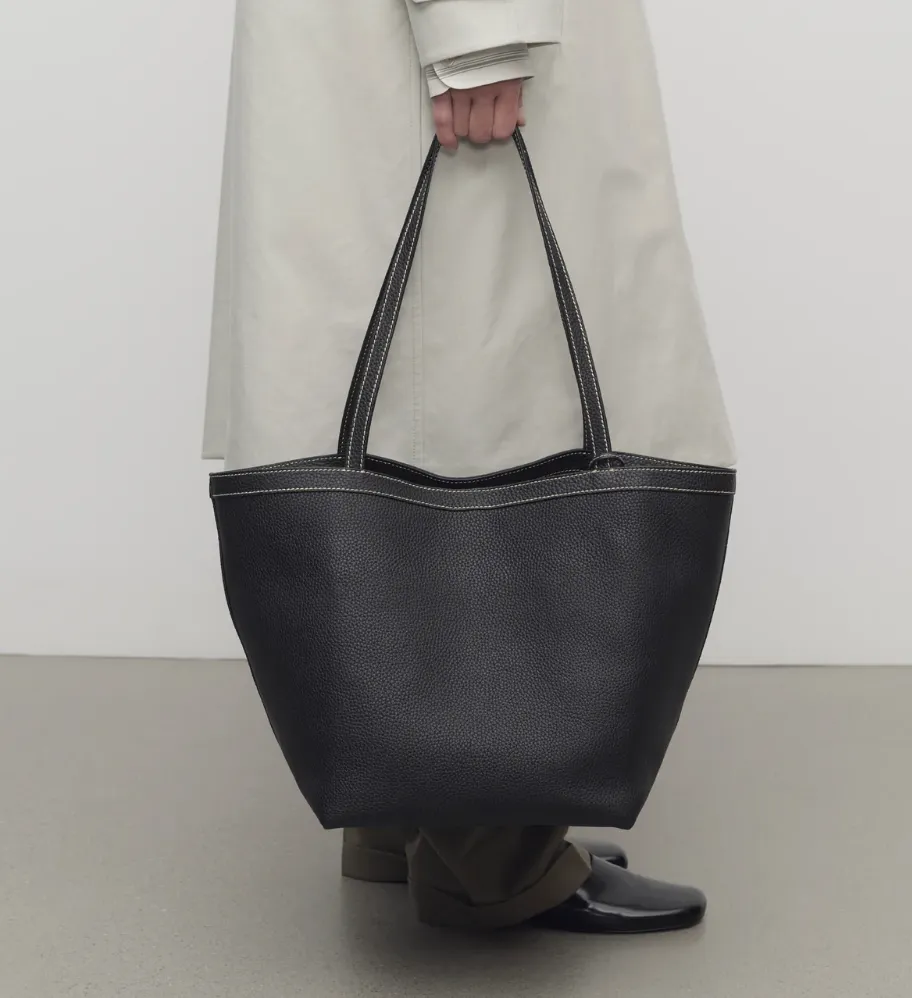
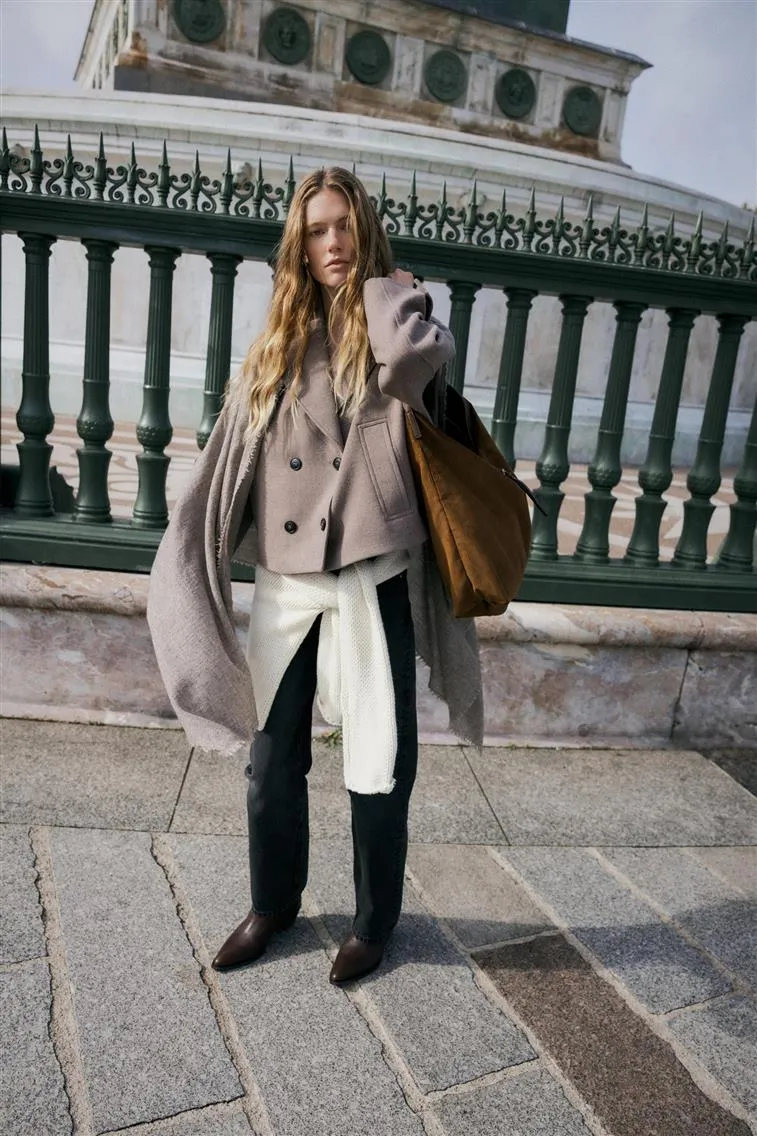 | For everyday totes or utility bags, think natural gestures: Over the shoulder, walking forward, mid-step gives motion. Held by the handles low, with a relaxed grip to show scale. Slung on a chair or beside the model on the floor for casual, lived-in, editorial. |
For structured or luxury handbags, think controlled precision: Wrist-level holds with elongated fingers are clean and elegant. Cradling under the arm, baguette-style is youthful and sharp. One hand delicately adjusting the strap adds intimacy and tension. | 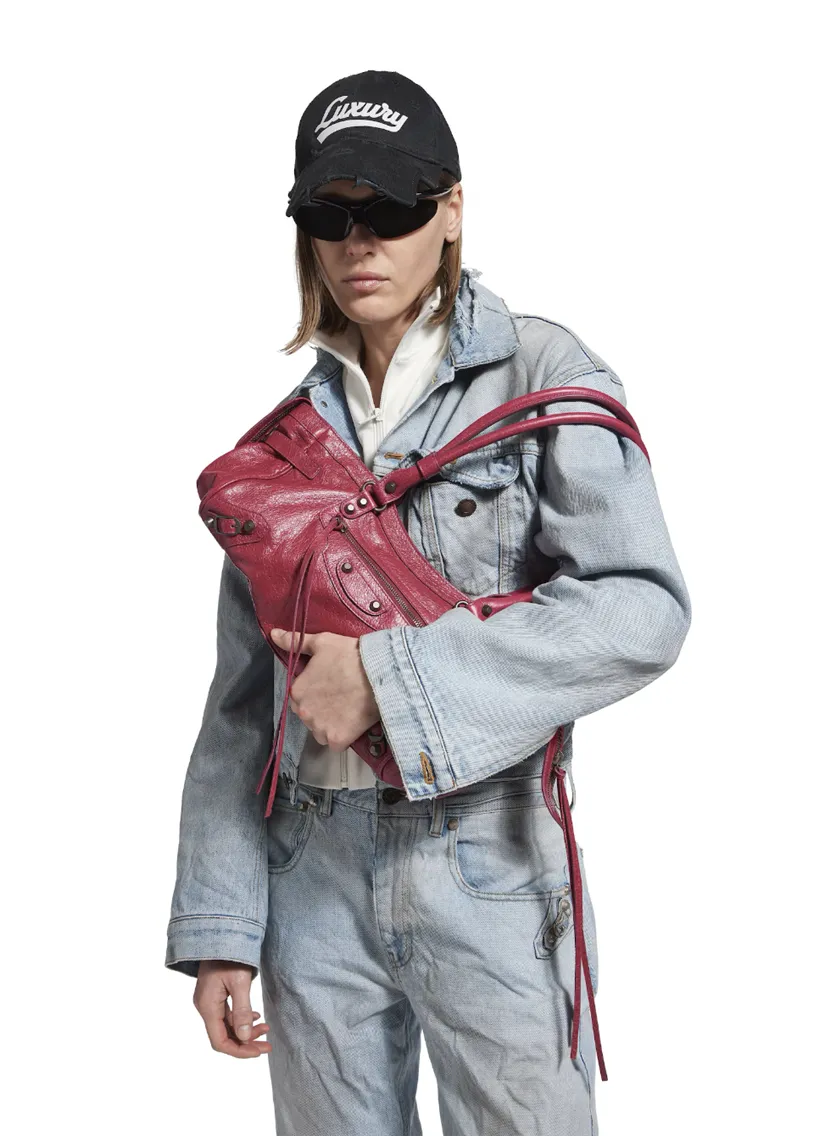 |
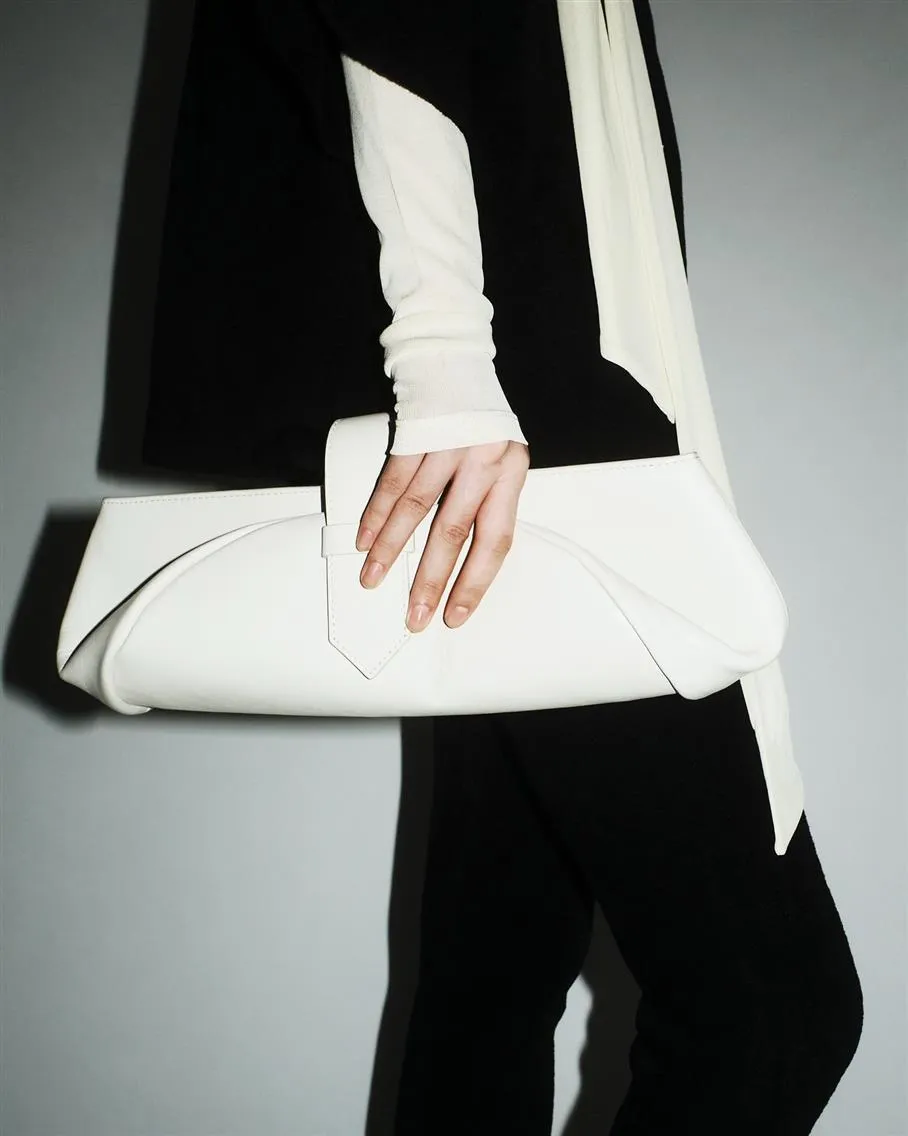 | For small crossbodies or clutches, it's about proportion: Tucked under the arm with a tailored outfit, think COS or The Row. Held in both hands like a treasure, communicates preciousness. Posed flat against the hip with negative space around to emphasize geometry. |
A model's body is a compositional frame. Bent elbows can echo curves in the bag. Arms and legs create triangles that direct the eye. These decisions are made before the shoot in the creative brief.
For guidance on casting models and building the on-model shoot brief: The Smart Way to Find and Choose Models for Your Brand Photoshoot
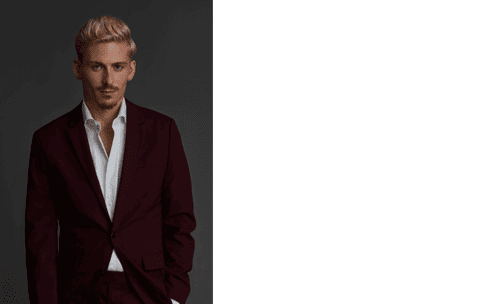
Faceless vs. Full Model: Where to Draw the Line
Sometimes the face adds context. Other times, it adds noise. Brands like A.P.C. and Toteme often crop above the shoulders. Because the bag is the character, and the body is just a scene partner.
But when identity is the sell, think Jacquemus, Balenciaga, or Diesel, full body and facial expression become part of the bag’s attitude. It’s no longer about scale or functionality. It’s about aspiration.
For the stylist's role in on-model bag photography: Why Your Shoot Needs a Professional Fashion Stylist
Post-Production in Bag Photography
What Gets Retouched and Why It Matters
Bags have a way of collecting problems. Even with perfect prep and lighting, things slip through. And when buyers are zooming in at 200% online, every detail counts.
Here’s what you’ll almost always deal with:
- Dust and lint, especially on suede and canvas. Studio lighting amplifies the tiniest specs.
- Shape corrections, straps that don’t sit quite right, slightly warped bottom panels, uneven folds.
- Hardware glare, especially on logos and zippers. Cleaning up hot spots without flattening the image is a must.
- Color correction, leather tones shift under studio light. The goal is to match reality, not beautify.
- Background cleanup, dust, shadows, backdrop seams. Especially critical for eCommerce listings or grid layouts.
You’re editing for clarity and consistency across dozens of images, across SKUs, across seasons.
For the technical retouching workflow for leather, hardware, and catalog consistency: Advanced Product Photo Editing Techniques
When to Outsource Retouching
Most photographers working at volume do not have time to retouch 40 bags a week. The real cost is not the hours — it is consistency across a client's full catalog and the mental space to focus on capture rather than correction.
Working with a dedicated retouching partner locks in a standardized look across SKUs, seasons, and shoots. The brief is set once: color standard, shadow treatment, finish level. Every batch that follows meets the same spec.
LenFlash provides retouching for photographers at both ends of the volume range. High-volume catalog retouching — fast, clean, consistent across large batches. Creative retouching for campaign assets — matched to your lighting style and visual tone, preserving the character of the original photography. File management through LenFlash Cloud — centralized review, approval, and version tracking without scattered email threads or disorganized shared drives.


