


Jewelry and Watch Product Photography Editing Techniques: A Pro’s Guide for Flawless Retouching
Jewelry and watches are among the most technically demanding product categories in eCommerce retouching. Highly reflective surfaces, intricate details at macro scale, and color accuracy that must match physical reality, these are not challenges that general product retouching experience fully prepares a retoucher for.
The techniques required are specific to the material behavior of polished metals, gemstones, and watch components, and mastering them is what separates adequate jewelry retouching from professional-grade work.
This guide covers the complete post-production workflow for jewelry and watch photography, from clipping paths through output delivery, with specific parameters for each stage.
Part of our complete retouching guide: How Product Photo Editing Services Impact Online Sales
What Sets Jewelry and Watch Retouching Apart
Intricate details at macro scale
A diamond ring or luxury watch contains details like prong settings, bezel engravings, dial indices that are invisible at standard product photography scale but critical to the customer's assessment of quality. Every millimeter of a piece matters, and the image must communicate it. This demands macro-level precision in both shooting and post-production that most product categories do not require.
High reflectivity
Polished metals, gemstones, and watch crystals behave like mirrors, reflecting everything in their environment. Managing these reflections during retouching is as important as controlling them during the shoot. The goal is to retain the reflections that communicate material quality while removing the ones that distract from the product.
Color accuracy
Misrepresenting the color of a gemstone or the finish of a watch band produces returns. The deep red of a ruby, the icy tone of platinum, the warmth of yellow gold — these need to be captured and maintained through post-production with reference to the physical piece, not to what looks appealing on screen.
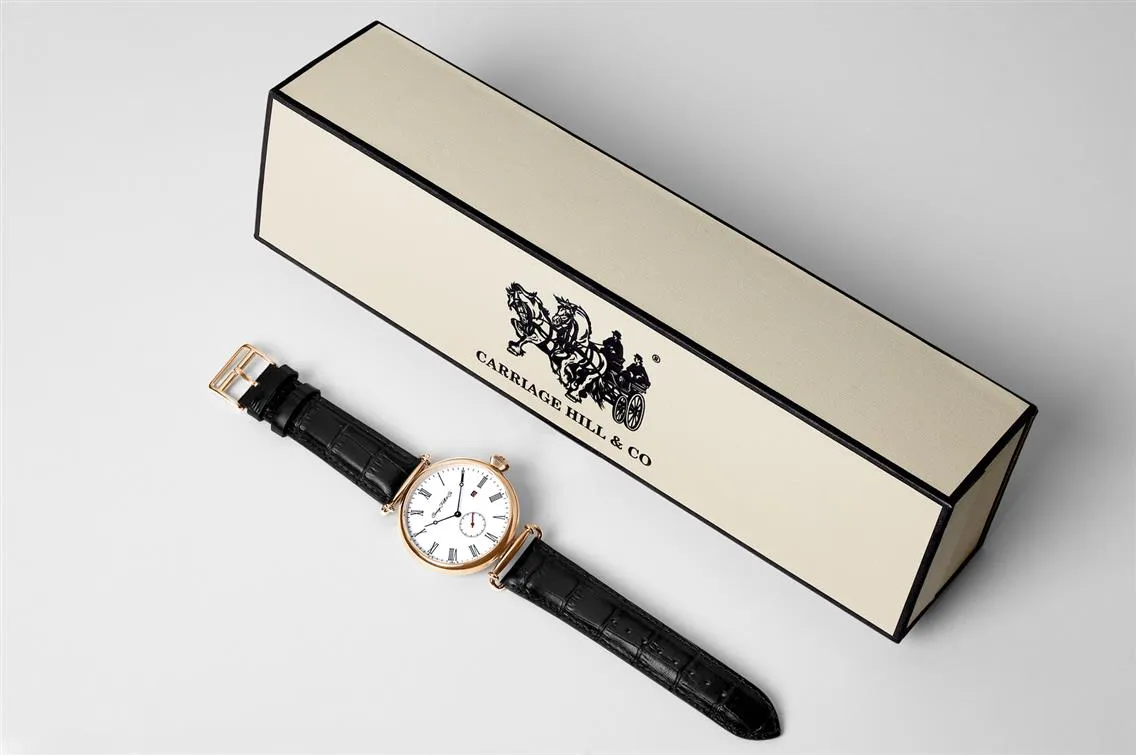
Luxury positioning
Jewelry and watches are aspirational products. The retouching must communicate sophistication and precision without over-processing the image into something that looks artificial. The standard is not perfection, it is authenticity at its most refined. For how retouching standards connect to luxury brand positioning: Photography That Appeals to Luxury Jewelry Buyers
Why Jewelry and Watch Retouching Have Similar Needs
Even though jewelry and watches are distinct products, they share several common challenges in retouching.
Reflection Handling: Both are highly reflective, requiring careful control of light and editing to avoid distracting glares.
Detail Preservation: Fine craftsmanship is central to their appeal, so every engraving, texture, and gemstone must remain crisp and sharp.
Brilliance and Sparkle: The sparkle of a diamond and the polished shine of a watch case are crucial selling points. The retoucher’s job is to enhance these features without overdoing it. If you can master these shared needs, you’re already halfway to producing stunning visuals for both categories.
Proper Jewelry and Watch Photography for Better Retouching
Retouching does not happen independently of the shoot. What is captured (and how) determines what is achievable in post-production. A short pre-production conversation between photographer and retoucher eliminates most of the problems that consume retouching time.
Capture a color reference shot. Photograph the piece alongside a color checker card under the same lighting. This gives the retoucher a calibration reference that makes color correction faster and more accurate than working from memory or screen assessment alone.
Shoot multiple exposures for compositing. For pieces with both highly polished metal surfaces and gemstones, the correct exposure for metal and the correct exposure for stones are rarely the same. Capture separate exposures for each material type during the shoot, this is faster and more reliable than trying to recover the full dynamic range from a single frame in post.
Use consistent reflection placement. If multiple pieces from the same collection are being shot, maintain consistent lighting and camera position so reflections fall in the same area of each piece. Inconsistent reflection placement across a collection requires individual retouching decisions for each image rather than batch corrections.
Flag focus stack sequences. For pieces that require focus stacking, mark the sequence clearly during culling so the retoucher knows which frames belong together. Mislabeled sequences produce alignment errors that are time-consuming to diagnose.
Read more: What Separates Professional Watch Photographer from Product Photographer
Complete Retouching Workflow: Stage by Stage
Stage 1: Culling and file organization
Post-production begins with selecting images that have the potential to deliver after editing. Only frames with correct focus, usable reflection patterns, and sufficient detail in key areas move forward. Culling at this stage prevents time spent retouching images that cannot be saved.
Organize files by product type, angle, and whether they are part of a focus stack sequence or exposure composite set. Clear file organization prevents the most common source of retouching errors, working on the wrong frame.
Stage 2: Clipping path
Use the Pen Tool for clipping paths on jewelry and watches. Adjust anchor points carefully around irregular shapes — prongs, chains, bezels, bracelet links. Apply a feather of 0.5 to 1 pixel to avoid harsh edges that make the product appear cut out rather than photographed.
Save clipping paths as reusable selections to allow background adjustments and further masking without repeating the path work. For complex jewelry pieces, use multiple paths or layer masks to isolate different elements (metal, stones, chains) independently. This gives precise control over each material during color correction and brightness adjustments.
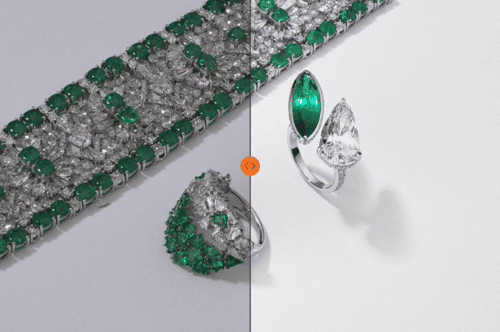
Stage 3: Exposure compositing for mixed materials
This stage applies when a piece has multiple material types — polished metal and gemstones, brushed and polished case surfaces on a watch, a piece where the chain requires different exposure treatment from the pendant.
Open all exposure variants as layers in the same Photoshop document. Place the correctly exposed metal layer on top and add a layer mask. Use a soft black brush to paint through the mask in the areas where the gemstone or secondary material exposure should show — the mask reveals the layer below rather than deleting the layer above, keeping the edit fully non-destructive.
For gemstone areas specifically: the goal is to show the stone's internal structure, color depth, and brilliance at the correct exposure while the surrounding metal reads at its own correct level. Blend the transition between the two exposures gradually, a hard edge between exposure zones is immediately visible and reads as composited rather than photographed.
For background compositing where a separate clean background exposure needs to be integrated, use the clipping path from Stage 2 to create a precise product silhouette and place the background layer below, adjusting shadow opacity to maintain grounding.
Stage 4: Focus stacking
Focus stacking applies when a single frame cannot hold the full piece sharp due to depth of field limitations at macro scale.
Merging in Photoshop: Open all frames in the focus stack sequence as layers — File > Scripts > Load Files into Stack, checking the Attempt to Automatically Align Source Images option. Once loaded, select all layers and go to Edit > Auto-Blend Layers, select Stack Images, and check both Seamless Tones and Colors and Content Aware Fill Transparent Areas. Photoshop generates a merged result with a mask on each layer showing only the sharpest areas from that frame.
Merging in Helicon Focus: Helicon Focus gives more control over blending method selection. Method A (Weighted Average) works well for smooth surfaces. Method B (Depth Map) produces cleaner results for complex three-dimensional shapes like chain links and prong settings. Method C (Pyramid) handles the most difficult cases where A and B both produce visible artifacts.
Correcting alignment artifacts: Even with image stabilization off and a cable release, micro-vibrations between frames create slight misalignment that produces ghosting or double edges in the merged result. In Photoshop, select the problem area on the mask and use a soft black brush to paint back to a single clean frame. In Helicon Focus, use the retouching tool to clone from the sharpest clean frame in the sequence.
What to look for in the merged result: Check the transitions between focus zones at 100% zoom, the seam between focal planes should be invisible. Check chain links, prong tips, and surface engravings specifically, as these are the areas where blending artifacts most commonly appear.
Stage 5: Exposure, contrast, curves, and white balance
Balancing exposure — adjust overall exposure while keeping highlights intact on gemstone surfaces and polished metal. Overexposure destroys surface detail. Underexposure flattens brilliance.
Contrast control — subtle contrast adjustments bring out the dimensionality of gemstones and polished surfaces without introducing artificial pop.
Curves — work with curves to lift highlights and deepen shadows, adding depth and visual weight to the image. Fine curve adjustments here do more for perceived luxury than any single other post-production decision.
White balance accuracy — use the Eyedropper tool to sample a neutral gray or white area for accurate color correction, or reference the color checker shot from the shoot. Diamonds benefit from a neutral white balance. Gold requires a warmer tone. Platinum should read bright but cool. Use adjustment layers throughout to preserve flexibility for future corrections.
Stage 6: Color correction
Gemstone colors — adjust saturation and vibrance selectively to enhance the natural beauty of each stone. For diamonds, focus on clarity and brilliance rather than adding color. For colored gemstones, emphasize their natural tones while maintaining restraint — oversaturation makes stones look artificial and directly causes returns.
Metal finishes — use the HSL (Hue, Saturation, Lightness) sliders to refine metal tones. Yellow gold should read rich but natural. Silver should read cool and reflective. Platinum should appear bright but understated. Rose gold requires particular care — its warmth should be preserved without shifting toward orange.
For collections, apply color adjustments uniformly using a Color Checker or physical product reference to match colors accurately across all images. Adobe Lightroom's Sync Settings function handles batch color matching for large sets shot under the same conditions.
For color calibration standards and monitor calibration workflow: Best Practices for Retouching eCommerce Product Photos
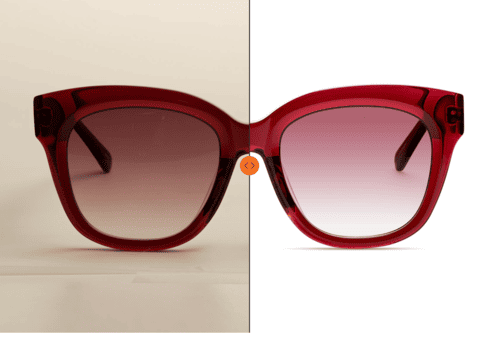
Stage 7: Background editing
Gradient backgrounds — use gradient layers in Photoshop to create smooth transitions that complement the product. A soft gray-to-white gradient highlights diamond brilliance and polished metal without competing with the product.
Solid white backgrounds — for eCommerce platform compliance, add subtle shadows beneath the product to prevent the floating effect that pure white produces when shadows are removed entirely.
Editorial backgrounds — for campaign or editorial shots, match background tones to the brand's aesthetic while ensuring the setting does not compete with the product. Use the Refine Edge tool to integrate the product with the background naturally, preserving shadows and edge detail.
Stage 8: Spot healing, dodge and burn
Spot healing — use the Spot Healing Brush or Clone Stamp to remove dust, scratches, and surface imperfections. On highly reflective surfaces, work carefully to preserve natural texture while removing distractions.
Dodge and burn:
- Dodge gemstone facets and metal highlight edges to enhance brilliance
- Burn edges and recessed areas to add depth and visual richness
- Work on separate layers for non-destructive editing
Use a soft, low-opacity brush and build effects gradually. A heavy hand with dodge and burn is the most common cause of artificial-looking jewelry retouching.
Stage 9: Sharpening
Sharpening is the final stage before output and should be applied selectively.
Selective sharpening — apply sharpening to high-detail areas: gemstone facets, watch dials, engravings, bezel edges. Leave backgrounds and smooth surfaces unsharpened.
High Pass Filter method — duplicate the image layer, apply High Pass Filter, set the layer blending mode to Overlay or Soft Light, and adjust opacity to control sharpening intensity.
Unsharp Mask settings — Radius: 1-2 pixels, Threshold: 2-5 levels, Amount: 150-200% for fine detail work. Adjust based on image resolution and output size.
Always check sharpening results at 100% zoom. Halos and noise introduced by over-sharpening are not visible at thumbnail scale but become immediately apparent at full resolution and on high-DPI screens.
Watch-Specific Retouching
Watches present retouching challenges that jewelry does not, and they require specific attention beyond the general workflow above.
Crystal reflections
Watch crystals are curved glass surfaces that create reflection patterns fundamentally different from flat gemstone tables. The curvature means reflections shift across the crystal as the viewing angle changes, producing bands of light that can obscure dial detail. Managing these requires careful cloning and healing that follows the crystal's curvature rather than working in straight lines. Over-correction that removes all crystal reflections makes the watch look like a render rather than a photograph — the goal is controlled reduction, not elimination.
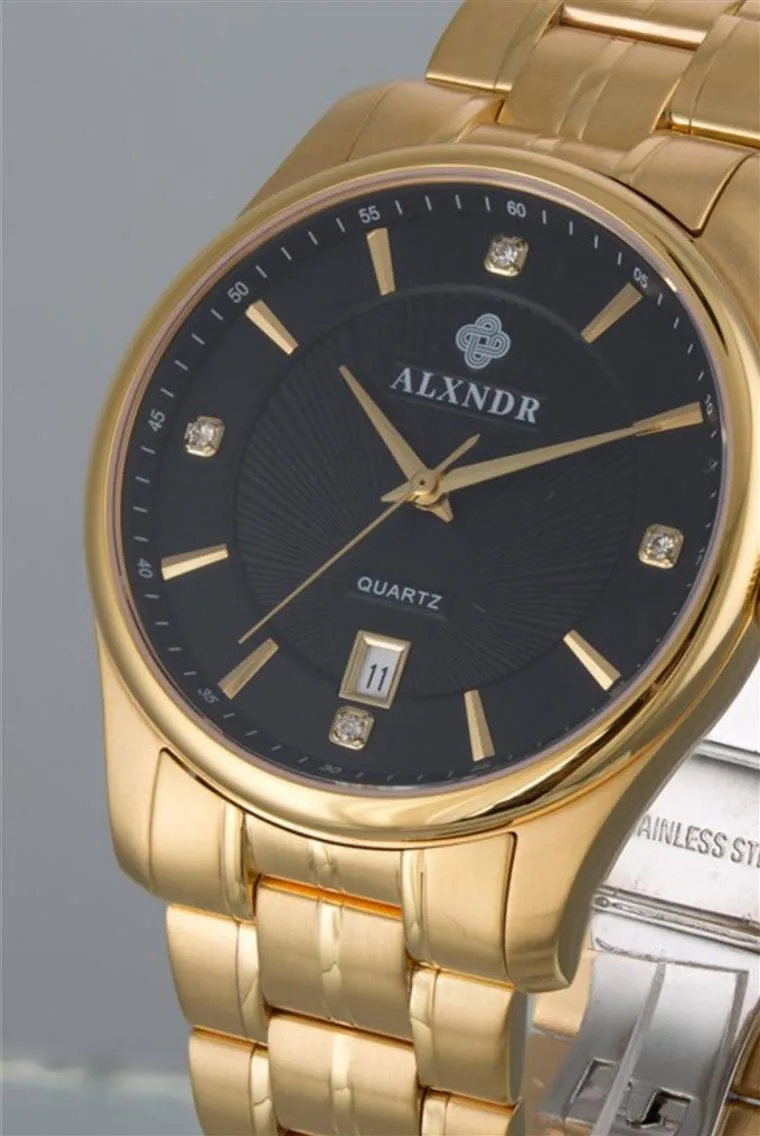
Dial legibility
The dial is the primary selling point of most watches and must remain perfectly legible after retouching. Indices, hands, and text need razor-sharp selective sharpening. The date window, subdials, and any applied indices need individual attention — these elements are physically raised from the dial surface and cast micro-shadows that communicate three-dimensionality. Removing these shadows in the pursuit of a clean image flattens the dial and removes exactly the detail that communicates watchmaking quality.
Lume — the luminescent material applied to hands and indices, often reads with an incorrect greenish cast under studio lighting. Selective hue correction on lume areas using Hue/Saturation adjustment layers with masking corrects this without affecting surrounding metal or dial colors.
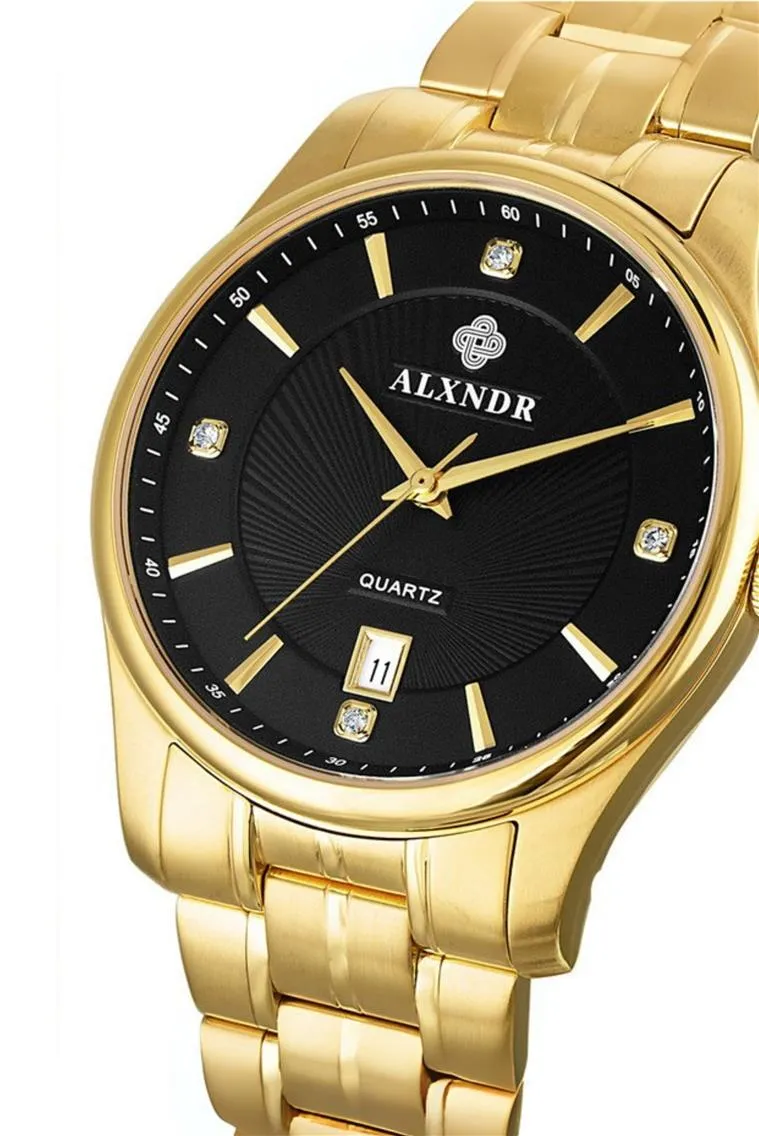
Mixed surface finishes
A single watch case frequently combines brushed and polished surfaces — a brushed case flank with polished lugs, or a brushed center link with polished outer links on a bracelet. These adjacent surfaces require completely different reflection treatment. Polished surfaces need specular highlights preserved. Brushed surfaces need their directional texture maintained without the reflections becoming distracting.
Use separate adjustment layers with precise masking for each surface type. A global correction that works for one finish will damage the other.
Crown and pusher details
The crown and any pushers are small mechanical elements that are easily lost in the overall retouching process. They require individual attention — dust and smudge removal, correct exposure relative to the case, and sharpening that reveals their knurling or fluting without introducing halos. On complicated watches with multiple pushers, check each one individually at 100% zoom before delivery.
Best Practices for Jewelry and Watch Product Photo Retouching
Consistency across a collection
Color harmony, lighting uniformity, and crop alignment must be maintained across every image in a collection. Inconsistent metal tones between product images like gold that reads slightly warmer in one image than another, mislead customers and make pieces appear mismatched on a product grid.
Use a reference image or color checker from the shoot to match colors across multiple files. Create cropping templates for consistent positioning across product types. Gradient masks in Photoshop allow subtle lighting adjustments while maintaining even tonal values across the set.
Ethical retouching
Over-editing in the luxury segment is immediately recognizable to experienced buyers and signals that the photography is compensating for something. The standard is enhancement within what the product actually is, not improvement beyond it.
Do not modify the shape of gemstones or make colors more vibrant than they appear in reality. Polished metal surfaces and gemstones naturally carry slight imperfections that add realism. Refine texture, do not eliminate it. For the relationship between ethical retouching and return rates: Reducing Product Return Rates Through Accurate Photography
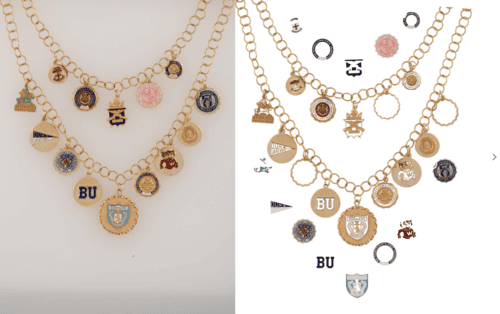
Balancing time and quality
Batch processing handles global adjustments efficiently across large sets. AI background removal tools handle isolation for straightforward pieces but require manual correction around intricate details like chains, clasps, and fine prong settings.
Focus stacking, exposure compositing, gemstone color accuracy, crystal reflection management, and metal surface precision all require manual judgment. For a complete guide to batch editing and automation tools: Best Practices for Retouching eCommerce Product Photos
On-Hand and On-Model Jewelry and Watch Photography Retouching
When jewelry and watches appear on a model or hand, the product must remain the focal point. Every retouching decision in these images serves that requirement.
Keeping the product primary
Selective dodge and burn are the primary tools. Brighten gemstone facets and metal edges to add brilliance. Darken areas surrounding the product to increase visual separation from the model. For watches, the dial and hands should be razor-sharp and perfectly lit — these are the detail areas buyers examine first, and softness here reads as poor quality regardless of how well the rest of the image is retouched.
The product should always remain the focal point of the composition. This means ensuring that lighting, sharpness, and color balance naturally draw the viewer’s eye to the product.
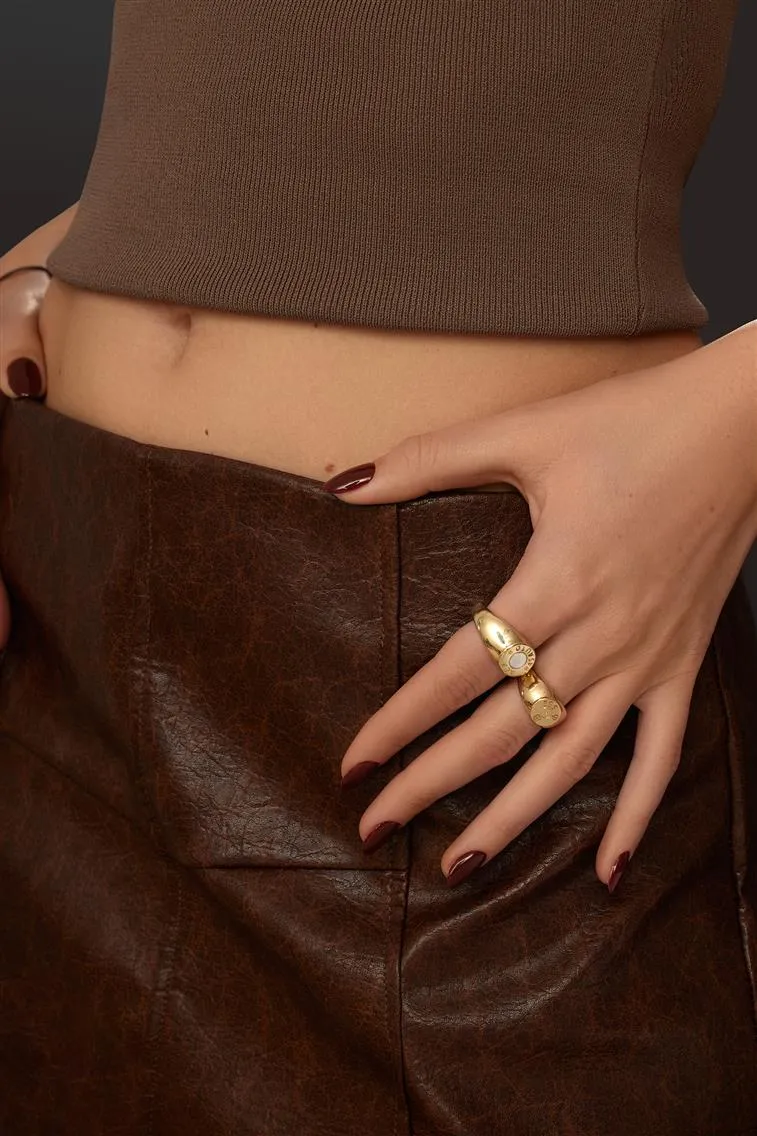
Skin and hand retouching
Use frequency separation to smooth skin texture while retaining natural pores and fine lines. Remove temporary imperfections — scratches, dry patches, prominent veins — that distract from the product without removing the natural character of the skin. For nails, ensure they are clean and polished with slightly brightened nail beds. Avoid whitening nails unnaturally, the goal is a well-maintained appearance that does not compete with the piece.
For guidance on casting models whose hand structure, wrist proportions, and neck length suit different jewelry types: The Smart Way to Find and Choose Models for Your Brand Photoshoot
Removing distractions
Flyaway hairs that obscure the product or draw attention away from it should be removed using the Clone Stamp or Healing Brush. Clothing textures or wrinkles that are too prominent should be softened while maintaining a natural appearance. Props and backgrounds in lifestyle shots should be pushed back using blur or tonal adjustments so they read as context rather than competing visual elements.
Consistency between on-model and standalone shots
The colors of metals and gemstones in on-model images must match those in standalone product shots. A gold ring that reads slightly warmer in a standalone shot than in an on-hand shot creates visual inconsistency that buyers notice when browsing a product page that includes both image types. Align color treatment, cropping standards, and background tone across both so the full image set reads as designed rather than assembled.


Output Standards by Platform
The retouching workflow produces a master file from which platform-specific outputs are exported. Delivering the wrong format or resolution for a given platform wastes retouching quality and can cause listing rejections.
eCommerce product pages — high-resolution JPEGs at a minimum of 2000 pixels on the longest side. This supports deep zoom functionality that allows buyers to inspect prong settings, surface finish, and gemstone detail before purchasing. Zoom capability is one of the most effective return-reduction tools for jewelry, customers who can examine a piece at close range before purchasing have fewer surprises when it arrives.
Amazon — minimum 1000 pixels on the longest side to enable zoom, with 2000+ recommended. Pure white background at RGB 255,255,255 for primary images. Save as JPEG with maximum quality to avoid compression artifacts visible at zoom scale.
Farfetch and luxury marketplaces — editorial-level quality with high-resolution delivery. These platforms enforce quality standards through submission review. Files below their quality threshold are rejected during automated processing.
Print and editorial — TIFF files at 300 DPI minimum, saved in Adobe RGB color space. Layered PSD files for any images that require adaptation across formats or markets.
Social media — web-optimized JPEGs or PNG files sized to each platform's optimal dimensions. Compression for social delivery should be applied as a final export step, not to the master file.
Maintain the layered PSD or TIFF master file for every retouched image. Clients requesting re-exports, format changes, or revisions months after delivery need access to the original retouched file rather than a re-edited compressed JPEG.
For photographers evaluating whether to handle jewelry and watch retouching in-house or delegate to a specialist studio: Product Retouching: Mastering or Delegating?